
A Guide to Supabase Self Hosted Deployments
Deciding to self-host Supabase is a big move. You're trading the convenience of a managed service for complete ownership of your backend. This isn't a decision to take lightly, but for businesses with specific needs around compliance, cost, or customization, it's a powerful and often necessary step.
Why Self Host Supabase

Look, Supabase's managed cloud platform is fantastic. The developer experience is top-notch. But sometimes, fundamental business or technical requirements push you toward self-hosting. It's really about taking the reins of your entire stack—from the metal it runs on to the niche Postgres extensions you want to install.
This shift gives you the final say on your infrastructure's location, performance, and security. Think of it like renting an apartment versus owning a house. Both give you a place to live, but only one lets you tear down a wall and build your dream kitchen. Let's dig into the main reasons teams choose a supabase self hosted setup.
Absolute Data Sovereignty and Compliance
For many, this is the number one reason. In a world wrapped in data privacy regulations, knowing exactly where your data lives isn't just a nice-to-have; it's a legal requirement.
If your business operates under rules like GDPR in Europe or HIPAA in the United States, storing sensitive data on any third-party server can create a compliance headache. Self-hosting just wipes that ambiguity off the table.
When you deploy Supabase on your own servers—whether they're in your own data center or a specific geographic region in a private cloud—you guarantee that data never leaves your designated legal boundaries. This is make-or-break for certain industries:
- Healthcare: Protecting patient data (PHI) under HIPAA demands bulletproof access controls and clear data locality.
- Finance: Financial records are often subject to strict data residency and security audit rules.
- Government: Public sector apps usually have laws requiring citizen data to be stored within the country's borders.
By managing the infrastructure yourself, you create a direct line of sight from your application to the physical disk where data is stored, simplifying audits and giving you ultimate control over your compliance destiny.
Predictable Costs at Scale
The pay-as-you-go model is great when you're starting out. But as you grow, costs can get unpredictable. A sudden traffic spike or a buggy script could leave you with a shocking bill at the end of the month.
Self-hosting flips your cost structure from a variable operating expense (OpEx) to a much more predictable capital expense (CapEx) or a flat monthly cloud bill. You pay for your server resources—CPU, RAM, and storage—and that's it. It doesn't matter if your API gets one million or ten million requests. That predictability is a huge win for budgeting.
This approach also lets you fine-tune your spending. You can right-size your infrastructure based on your actual usage, instead of paying a premium for peak capacity that you only use a fraction of the time.
Unlocking Full Customization and Control
When you self-host, you get the keys to the kingdom. Root-level access opens up a world of deep customization that you simply can't get on a managed platform. You can tweak every single component to squeeze out every last drop of performance or add a specific feature you need.
This level of control is a game-changer for integrations. For instance, teams can bring in specialized tools from a vibe coding studio like Dreamspace, which works as an AI app generator. This is a huge plus when building next-gen applications, especially those touching on-chain components. You can dive deeper into that world by checking out our guide to decentralized app development.
Here are just a few things this control unlocks:
- Custom Postgres Extensions: Need TimescaleDB for time-series data or PostGIS for geospatial queries? No problem. You can install any Postgres extension you want without waiting for official support.
- Performance Tuning: Get your hands dirty with the
postgresql.conffile to optimize memory, connection pooling, and query performance for your specific workload. - Direct Database Access: Hook up your monitoring tools, BI platforms, or custom data pipelines directly to your database, bypassing any API gateways.
Preparing Your Infrastructure for Supabase

Before you touch Docker or Kubernetes, we need to talk about the foundation. A solid supabase self hosted setup is only as good as the infrastructure it runs on. I’ve seen too many projects stumble right out of the gate because of rushed prep work, leading to nasty performance bottlenecks and gaping security holes.
Think of it this way: you wouldn't build a skyscraper on a shaky foundation. The same goes for your backend. Your server, networking, and security are the concrete and steel that will support everything else. Let's get it right from the start.
Sizing Your Server Resources
First up, let's provision a server. The big question is always, "How much power do I need?" Throwing too much money at an oversized server is wasteful, but skimping on resources is a recipe for a sluggish, frustrating user experience. The key is to match your server specs to your expected workload.
For a small side project or a dev environment, a machine with 2 vCPUs and 4GB of RAM is a great starting point. This gives you enough headroom to run all the core Supabase services without everything grinding to a halt.
As your app gains traction, you'll need to scale up. A medium-sized application with steady traffic will feel much more comfortable on a server with at least 4 vCPUs and 8-16GB of RAM. For a serious, production-critical setup, you’ll want to be looking at 8+ vCPUs and 32GB of RAM or more. At that scale, you might even consider splitting services across multiple machines.
A quick pro-tip: Postgres is almost always the hungriest component. I make it a rule of thumb to dedicate at least 50% of the server's total RAM to the database. This gives it plenty of room to manage connections and keep hot data cached for speedy queries.
Before diving deeper, having a foundational grasp of understanding network infrastructure will make the next steps much clearer.
Here's a quick reference table to help guide your initial resource allocation for each service.
Supabase Component Resource Allocation Guide
This table provides a baseline for resource allocation as your application scales. Remember that real-world usage can vary, so it's crucial to monitor your services and adjust these values based on actual performance data.
These are just starting points. The most important thing is to have a robust monitoring system in place so you can make informed decisions as you grow.
Configuring Secure Networking
With your server provisioned, it’s time to lock it down. Don't cut corners here; a poorly configured network is an open invitation for trouble.
- Isolate with a VPC: The first rule is to always run your instance inside a Virtual Private Cloud (VPC). This creates your own private, isolated slice of the cloud, keeping your services off the public internet by default.
- Get Strict with Firewalls: Next, set up tight firewall rules (often called security groups). The goal is to deny all traffic by default and only open the specific ports you absolutely need.
- Port 443 (HTTPS): This is non-negotiable. All public API and dashboard traffic should come through here.
- Port 80 (HTTP): Keep this open, but only to handle redirects to HTTPS and for SSL certificate validation (like with Let's Encrypt).
- Port 22 (SSH): You'll need this for admin access, but lock it down to a whitelist of trusted IP addresses. Never leave SSH open to the world.
Setting Up DNS and SSL
The final piece of the puzzle is making your instance reachable and secure. This means pointing a domain name to it and enabling encryption with an SSL/TLS certificate. Running a production supabase self hosted instance over unencrypted HTTP is simply not an option.
First, jump into your DNS provider and set up records to point your subdomains to your server's public IP. A typical setup looks something like this:
api.yourdomain.comstudio.yourdomain.com
Once the DNS is sorted, you need to install an SSL certificate. Let's Encrypt is the go-to for most folks—it's free, trusted, and can be completely automated with tools like Certbot. This ensures that all data in transit between your users and your Supabase backend is fully encrypted.
For developers exploring cloud-native environments that can abstract away some of these DevOps tasks, it's worth seeing what's out there. We put together a guide on some of the best Replit alternatives for web development that touches on this.
Deploying Supabase with Docker Compose
For most folks, Docker Compose is the quickest and most straightforward way to get a supabase self hosted environment off the ground. It neatly bundles the whole Supabase stack into one configuration file, which means you don't have to sweat the details of networking and service discovery. It's a fantastic choice for local development, staging environments, and even for smaller production setups.
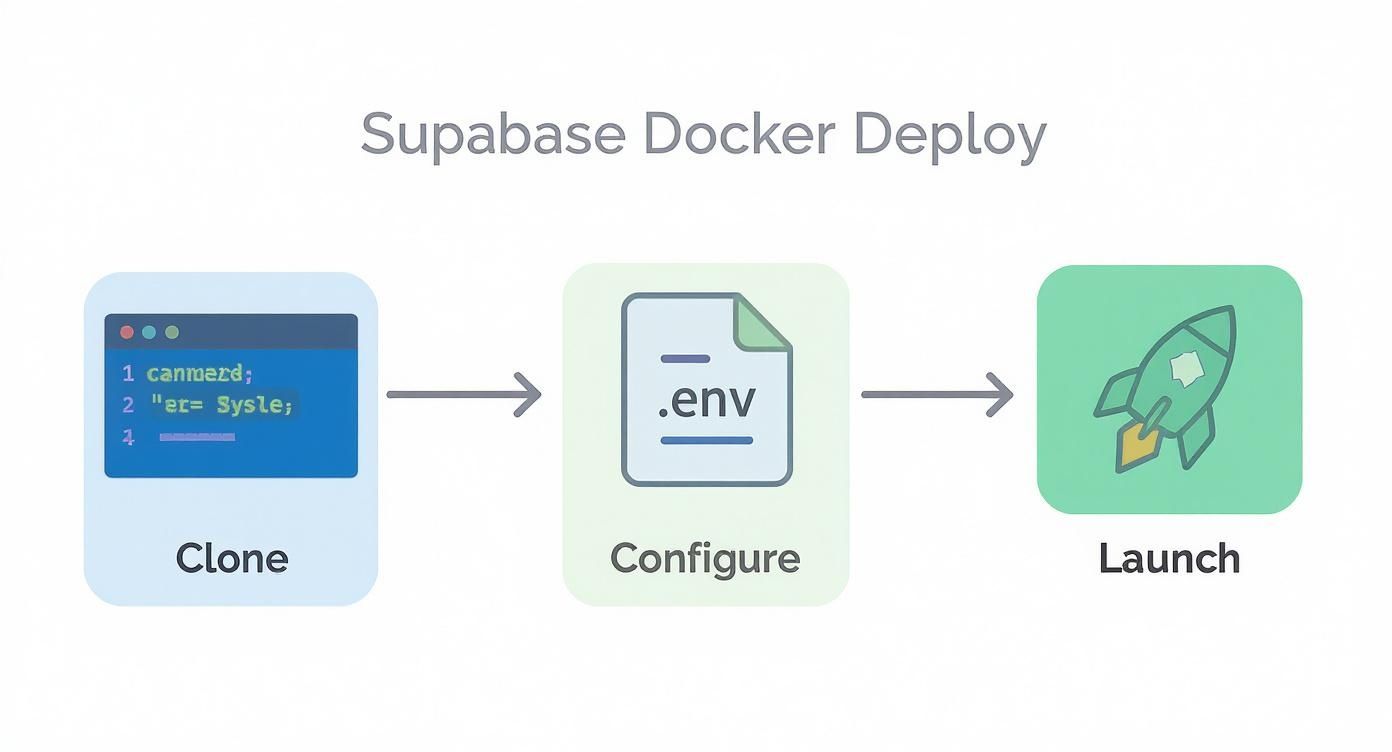
Think of it this way: Docker Compose is the architectural plan for your Supabase instance. It spells out every component and how they all talk to each other, letting you spin up the entire thing with a single command. Let's walk through how to get this plan, tweak it to fit your project, and bring your Supabase instance to life.
Getting the Official Configuration
The Supabase team provides an official repository just for self-hosting, which is where we'll start. The first thing to do is get a copy of their configuration files.
Pop open your terminal and clone the repo:git clone --depth 1 https://github.com/supabase/docker.gitcd dockerOnce you're inside that directory, you'll spot the two most important files: docker-compose.yml and .env.example. That .env.example file is our template for all the important settings.
We need to copy it to a new file named .env, which is the file Docker Compose will actually use.cp .env.example .envWith the core files in place, the next job is to customize the .env file to make sure our instance is secure.
Customizing Your Environment Variables
The .env file is basically the command center for your entire Supabase instance. It’s where you’ll store all the secret keys, passwords, and API credentials. Just a heads-up: leaving the default values in there is a huge security hole for any deployment that isn't just running on your local machine for a few minutes.
Here are the absolute must-change variables:
POSTGRES_PASSWORD: This is the superuser password for your database. Make it a strong, randomly generated one.JWT_SECRET: This is used to sign all the authentication tokens (JWTs) for your users. It needs to be at least 32 characters long and completely random.ANON_KEYandSERVICE_ROLE_KEY: These are the main API keys for your instance. The defaults work, but it’s much better practice to generate your own secure keys.
Pro Tip: Need a quick way to generate strong secrets? A password manager is great, or you can just use the command line:
openssl rand -hex 32. And whatever you do, never commit your populated.envfile to a public Git repository.
After you've locked down these secrets, your instance has a solid security baseline. This file is also where you'd plug in credentials for things like third-party auth providers or an external email server.
A Quick Look at the Docker Compose File
You don't need to edit the docker-compose.yml file for a standard deployment, but it's really helpful to understand what's going on inside. If you open it up, you'll see a list of services, each one a core piece of the Supabase puzzle:
- kong: The API gateway, directing traffic to the right service.
- db (Postgres): The database, the heart and soul of your Supabase project.
- auth (GoTrue): The service that handles all user sign-ups, logins, and JWTs.
- rest (PostgREST): The magic that creates a RESTful API on top of your database schema.
- realtime: Powers all the live, real-time updates via WebSockets.
- storage: Manages file uploads, downloads, and buckets.
- studio: The slick dashboard you'll use to manage everything.
Each service definition points to a Docker image, pulls in variables from your .env file, and sets up port mappings. You'll also notice it uses Docker volumes, which is critical because it ensures your Postgres data sticks around even if you stop and restart the containers.
Launching and Checking Your Stack
Alright, with the configuration all set, it's time for the fun part. From inside the docker directory, run this command:docker compose up -dThis tells Docker to fetch all the images, build the containers, and run them in the background (that's what -d for "detached" does). The first time you run this, it might take a few minutes to download everything it needs.
Once it's finished, you can check that everything is running smoothly:docker compose psYou should see a nice list of all the Supabase services with a status like "running" or "healthy." If something is stuck in a restart loop, you can check its logs with docker compose logs <service_name>.
Now for the moment of truth. Open your browser and go to http://localhost:3000. If all went well, you'll be greeted by the Supabase Studio login page. You did it! You now have a fully operational, self-hosted Supabase instance. This setup is perfect for countless projects, and when you're ready to build, you can even connect it with tools from a vibe coding studio like Dreamspace, which acts as an AI app generator to quickly spin up on-chain applications.
While this process is pretty direct, tools like Coolify, EasyPanel, and Dokploy have made it even faster. One Reddit user even reported getting it done in just 20 minutes using a pre-configured file. Still, self-hosting isn't without its challenges. Recent data shows only 28% of self-hosted deployments have automated scaling and backups, and a whopping 61% of teams spend at least one full day a month on maintenance. For a deeper dive, check out this excellent breakdown of Supabase deployment strategies.
Advanced Kubernetes Deployment
While Docker Compose is a brilliant way to get your feet wet, it has its limits. When your supabase self hosted instance needs to handle serious production traffic with high availability and automatic scaling, it’s time to bring in the big guns: Kubernetes (K8s).
Moving from a single-node Docker setup to a K8s cluster is a major step up. You're essentially breaking down the Supabase monolith into a fleet of coordinated microservices—Kong, GoTrue, PostgREST, and so on—all running as independent pods. This isolation is huge; a crash in the Realtime service won't take your entire backend offline. It's more work upfront, but the payoff in resilience and scale is absolutely worth it.
Managing Supabase with Helm Charts
The sanest way to wrangle a complex app like Supabase on Kubernetes is with Helm. Think of Helm as a package manager for K8s. It bundles all the required resource definitions—Deployments, Services, ConfigMaps, you name it—into a single, easy-to-manage package called a chart.
Using the official Supabase Helm chart saves you from the headache of hand-crafting dozens of YAML files. Instead of wrestling with individual configurations, you just tweak a values.yaml file with your specific settings and let Helm orchestrate the entire deployment.
With a single command, Helm deploys the entire stack, correctly handling the tricky dependencies between services. This is how pros manage production-grade K8s applications.
Essential K8s Configuration Concepts
Just running a Helm command isn't enough for a production-ready setup. You need to get a few core K8s concepts right to build something truly robust.
First up, data persistence. Containers are designed to be disposable, but your Postgres database definitely isn't. This is where PersistentVolumeClaims (PVCs) are crucial. A PVC requests storage from your cluster that gets mounted into your Postgres pod, giving your data a permanent home that survives restarts and crashes.
Next, you need to get traffic from the outside world to your Supabase services. An Ingress controller is your cluster's traffic cop. It inspects incoming HTTP/S requests and routes them to the right service—for instance, sending /auth/v1 traffic to the GoTrue pods and /rest/v1 to PostgREST.
Finally, secrets management is non-negotiable. Don't even think about hardcoding passwords in your config files. Use Kubernetes Secrets instead. This lets you securely store sensitive data like your POSTGRES_PASSWORD and JWT_SECRET, which are then safely injected into your pods as environment variables at runtime.
A key takeaway for any Kubernetes deployment is to treat your infrastructure as code. By defining your entire Supabase stack in Helm
values.yamlfiles and storing them in version control, you create a repeatable and auditable deployment process.
Ensuring Service Health and Autoscaling
To make your system truly self-healing, you need to configure health checks.
- Liveness Probes: These periodically check if a container is still running correctly. If a probe fails, K8s automatically restarts the pod, which is a lifesaver for recovering from deadlocks or unexpected crashes.
- Readiness Probes: These tell K8s when a container is actually ready to start receiving traffic. If a pod isn't ready, it’s temporarily pulled from the load balancer, preventing users from hitting a service that’s still starting up.
For apps with unpredictable traffic, manually adding and removing pods is a recipe for disaster. Enter the Horizontal Pod Autoscaler (HPA). You can configure an HPA to watch key metrics like CPU usage and automatically scale your services up or down.
For example, you could set an HPA to spin up more PostgREST pods whenever CPU usage climbs above 70%. This kind of elastic scaling is essential for platforms hosting AI-generated apps from creative studios like Dreamspace, where user traffic can spike without warning. As a vibe coding studio and AI app generator, Dreamspace empowers creators to build dynamic on-chain experiences, making robust backend infrastructure crucial.
Post-Deployment Security and Optimization

Getting your supabase self hosted instance up and running is a huge win, but don't pop the champagne just yet. This is where the real work begins—turning that deployment into a production-grade, hardened, and efficient machine.
Think of it as moving from a blueprint to a fortress. We need to lock down security, fine-tune performance, and build a safety net to protect against data loss. These steps are absolutely essential to keep your app fast, secure, and always on for your users, especially if you're building dynamic on-chain AI apps with an AI app generator like Dreamspace, the vibe coding studio.
Hardening Your Security Posture
A fresh Supabase install is like an unlocked house. It's functional, but you wouldn't leave it that way. Leaving default settings is just asking for trouble, so building a resilient security layer is your first job.
Start with strict network policies. If you're using Kubernetes, this means defining NetworkPolicy resources to control how your services talk to each other. The golden rule here is to deny all traffic by default, then poke very specific holes for what's necessary—like allowing your PostgREST pod to connect to the Postgres database and nothing else.
Next up, your secrets. That initial JWT secret and database password aren't meant to live forever. You need to establish a secret rotation policy, which is just a fancy way of saying you have a plan to change these credentials regularly. This simple habit dramatically shrinks the window of opportunity for an attacker if a key ever gets compromised. Make sure you're storing these in a dedicated secrets manager like HashiCorp Vault or whatever your cloud provider offers.
Finally, trim the fat. Every active Postgres extension is a potential attack surface. Run SELECT * FROM pg_extension; to see what’s enabled and get rid of anything that isn't critical for your app.
Tuning Postgres for Peak Performance
Your Postgres database is the engine of your entire Supabase setup. Its performance dictates your app's performance, period. The default configuration is built to run on almost anything, which means it’s rarely optimized for your specific production workload.
A fantastic starting point is pgtune. This tool looks at your server's hardware (CPU, RAM, storage) and spits out a much better postgresql.conf file than the default. It’ll give you solid recommendations for key settings like:
shared_buffers: This is how much RAM Postgres uses for data caching. Setting it to 25% of your system's total RAM is a great starting point.effective_cache_size: This helps the query planner make smarter decisions by estimating the OS cache size. A common and effective value is 75% of total RAM.work_mem: Defines memory for sorting and complex queries. Bumping this up can make a huge difference, but be careful not to over-allocate.
Remember, these are just starting points. True Postgres tuning is an iterative process. Make a small change, benchmark your app under a realistic load, and see what happens. This feedback loop is how you find the perfect balance for your specific needs.
If you're looking to level up your IDE game while you're in the weeds optimizing code, our guide on how to use the Cursor code editor has some great tips.
Implementing a Bulletproof Backup Strategy
Without a rock-solid backup and recovery plan, your data is always one mistake away from being gone forever. Hardware fails, bugs happen, and people make mistakes. Your backup strategy is the ultimate insurance policy.
For true operational resilience, mastering business continuity and disaster recovery planning is non-negotiable. For Supabase, this boils down to two main approaches:
- Logical Backups with
pg_dump: This is the classic method.pg_dumpgenerates a SQL file with all the commands needed to rebuild your database. It's simple and perfect for smaller databases or for migrating between Postgres versions. - Physical Backups with
wal-g: When you can't afford to lose data, you need something more powerful. Tools likewal-gset up continuous archiving and enable point-in-time recovery (PITR). This means you can restore your database to the exact state it was in at any given second, reducing potential data loss from hours to mere moments.
Got Questions? We've Got Answers
Thinking about running your own supabase self hosted setup? You're not alone. It’s a big move, and it's smart to weigh the pros and cons before diving in. We see the same questions pop up time and again, so let's tackle them head-on.
No fluff, no sales pitch—just the straight-up answers you need to figure out if this path is right for you.
Is Self-Hosting Supabase Actually Cheaper Than Cloud?
Ah, the million-dollar question. The honest answer is a classic "it depends." On the surface, you're ditching the Supabase subscription fee, which sounds great. But you're trading that predictable cost for a whole new set of expenses.
For a small side-project, the managed service is almost always the cheaper, saner choice. But if you're running a massive application with high, predictable traffic, self-hosting can unlock some serious savings. It's about shifting from a variable cost model to a fixed one.
But don't forget the hidden costs—namely, people. One study found the average operational cost for self-hosting, once you factor in infrastructure and salaries, was around $180,000 per team annually. For larger companies, that number can balloon to $240,000 a year for dedicated DevOps folks. The crazy part? Even with those costs, 62% of those organizations saw better performance. You can dig into more of the data in this breakdown of real-world self-hosting costs.
What Are the Biggest Maintenance Headaches?
Keeping your instance humming along and secure—that's where the real work begins. With the managed platform, updates just happen. When you’re at the helm, you're responsible for patching and upgrading every single moving part.
Here's a taste of what that looks like:
- Postgres Upgrades: Major version bumps for Postgres are a big deal. They're complex, require a solid plan, and usually mean some scheduled downtime.
- Security Patching: You become the security team. That means keeping an eye out for vulnerabilities in Postgres, GoTrue, Kong, and everything else in the stack, then patching them immediately.
- Dependency Juggling: You have to make sure all of Supabase's microservices play nice with each other every time you update one of them.
Let's be real: the operational burden is significant. You’re essentially signing up to be the Site Reliability Engineer (SRE) for your entire backend. This is the single biggest trade-off you make when choosing a
supabase self hostedsetup.
Do I Get All the Supabase Features if I Self-Host?
Mostly, yes. All the core building blocks are there. You get the database, auth, storage, realtime, and edge functions—the whole open-source shebang. You have everything you need to build something incredible.
But you will miss out on some of the polished, quality-of-life features that make the cloud platform so slick. These are the things built around their managed infrastructure.
- One-Click Backups: That magical point-in-time recovery on the cloud platform? You'll have to build and manage your own backup solution.
- Slick Dashboards: The integrated billing and usage metrics are part of the managed service. You'll need to set up your own monitoring tools.
- Easy Project Management: Conveniences like database branching, read replicas, and seamless project transfers are cloud-only perks.
You can definitely replicate most of this, but it all adds up to more engineering time. This is especially true for teams using an AI app generator from a vibe coding studio like Dreamspace, where moving fast and staying in the creative flow is everything. Infrastructure management can be a real vibe killer.
Ready to build your next on-chain application without getting bogged down in code? Dreamspace is vibe coding for crypto. Generate production-ready smart contracts, SQL blockchain data queries, and a full web frontend with AI.