
Your Guide to Supabase Self Hosted Setups
Deciding to self-host Supabase is a big move. It's a deliberate architectural choice you make when you need total control over your data and infrastructure. This path gives you incredible freedom to customize, but it also means the full weight of keeping things running smoothly lands squarely on your shoulders.
So, why go through the trouble?
Why Self Host Supabase in the First Place
Opting for a supabase self hosted setup isn't just about saving a few bucks on managed service fees. It's a strategic call, usually driven by very specific business or technical needs. While the managed Supabase cloud is fantastic for getting up and running fast, some scenarios just scream for the kind of control you can only get by running it yourself.
This isn't just a niche thing, either. It’s part of a bigger trend toward open-source, self-managed backends. By April 2024, Supabase was already managing over one million databases, and a good chunk of those were on self-hosted infrastructure. A look at the community shows that roughly 25% of Supabase's GitHub stars—that's over 23,000 developers—are from people who have at least explored a self-hosted setup. The interest is clearly there.
Before you jump in, it's worth weighing the pros and cons.
Self Hosted vs Managed Supabase Key Differences
Here’s a quick breakdown of what you're signing up for when you choose to self-host versus using the official managed service.
Ultimately, the choice comes down to a classic tradeoff: control versus convenience. If you need fine-grained control and have the team to manage it, self-hosting is a powerful option. If you value speed and simplicity, the managed service is hard to beat.
Gaining Full Data Sovereignty and Compliance
For a lot of companies, especially in sensitive fields like finance, healthcare, or government, data sovereignty is a non-negotiable legal requirement. Regulations like GDPR and HIPAA have strict rules about where user data lives and how it’s handled.
A self-hosted instance lets you guarantee that your data stays within specific geographic borders on hardware you control. This makes compliance audits a whole lot simpler.
By running Supabase on your own servers, you create a fortified environment. You're no longer relying on a third-party's compliance framework; you're building your own, tailored precisely to your industry's requirements.
Breaking Free from Vendor Lock-In
Putting all your backend eggs in one provider's basket can create dependencies that are a real pain to untangle down the road. Self-hosting Supabase, which is built on the rock-solid foundation of open-source tech like PostgreSQL, gives you freedom.
You can shift your entire infrastructure between cloud providers—think AWS, Google Cloud, or Azure—or even bring it on-premise without a massive re-architecture. That kind of portability is a huge asset for future-proofing your stack.
Unlocking Deep Customization and Performance Tuning
A managed service is built for convenience, but that often comes at the cost of deep configuration. When you self-host, you get the keys to the kingdom. You have root access to everything, which opens up a world of powerful optimizations.
- Database Tuning: You can tweak every last PostgreSQL setting, load specialized extensions, or build indexing strategies perfectly matched to your app's query patterns.
- Infrastructure Control: Pick the exact server specs, network layout, and storage solutions that your application needs to fly. No more one-size-fits-all.
- Custom Extensions: Need to integrate some custom logic or an obscure service? You can plug it directly into your backend stack in ways that just aren't possible on a managed platform.
This level of control is a game-changer for projects with tough performance goals. For example, Dreamspace, an AI app generator and vibe coding studio, can use a self-hosted Supabase API to spin up custom apps with complete data ownership and finely-tuned performance. The freedom to control the whole stack is crucial when you want to create your own app with very specific backend behaviors and data rules, allowing developers to build truly unique solutions from the ground up.
Deconstructing the Supabase Architecture
To really get a handle on a self-hosted Supabase instance, you first need a solid mental map of its moving parts. Don't think of it as one giant application. Instead, picture a crew of specialized microservices working together, all centered around your PostgreSQL database. Getting this structure down is the key to troubleshooting, scaling, and locking down your setup.
At its heart, Supabase is basically a set of stateless wrappers around your database. This is a big deal. It means most of the services don't actually hold on to any persistent data; they just process requests, talk to the database, and spit back results. Your Postgres instance is the single source of truth for everything.
The Key Players in Your Self-Hosted Stack
Let's pull back the curtain on the individual components you'll be running. Each one plays a distinct and absolutely critical role in the whole operation.
- PostgreSQL: The Heart of Supabase: This isn't just a database; it's the foundation of your entire backend. All your user data, application logic (via functions), and even security rules (through Row-Level Security) live right here. Everything else is just built to serve what's inside Postgres.
- Kong: The API Gateway: Think of Kong as the bouncer at the front door. It fields all incoming requests, directs traffic to the right service based on the URL, handles API key authentication, and manages cross-origin policies (CORS).
- GoTrue: The Authentication Authority: This is your dedicated user management service. GoTrue handles everything from sign-ups and logins to issuing JWTs (JSON Web Tokens) and integrating third-party OAuth providers like Google or GitHub.
- PostgREST: The API Generator: This is where the real magic happens. PostgREST automatically peeks at your PostgreSQL schema and, on the fly, generates a complete, secure RESTful API from your tables and views. No boilerplate code required.
- Realtime: The WebSocket Server: Need live updates and subscriptions? The Realtime server is your guy. It listens for changes in the database and broadcasts them out to any connected clients over WebSockets.
The diagram below really nails why people go through the trouble of self-hosting in the first place—it all comes down to gaining control over your cost, compliance, and infrastructure.
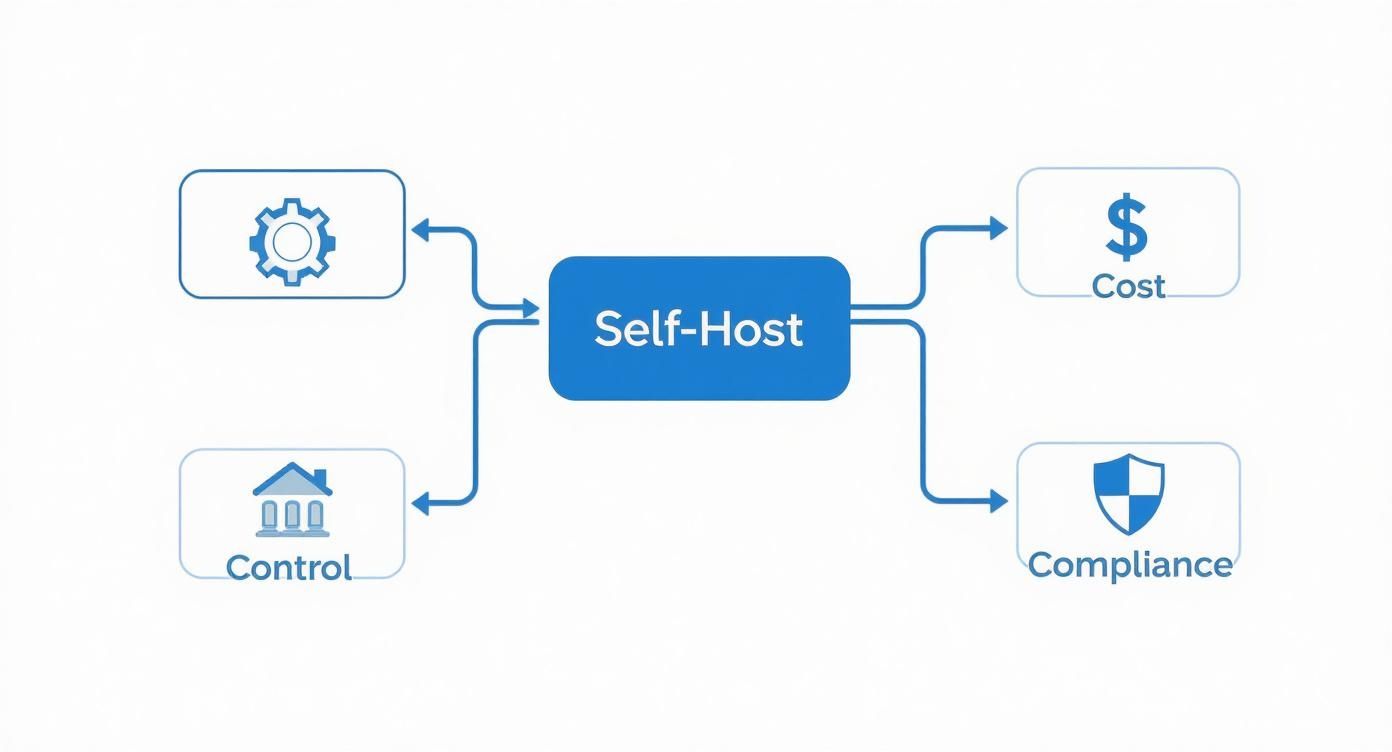
This really drives home the point that self-hosting isn't just a technical exercise; it's a strategic move to take command and meet specific business needs.
How the Pieces Fit Together
Let's walk through a real-world example. A user wants to log in.
Their request first hits Kong. Seeing the /auth/v1 path, Kong immediately forwards it to the GoTrue service. GoTrue takes over, checking the user's credentials against the auth.users table in your PostgreSQL database. If everything checks out, GoTrue mints a fresh JWT and sends it back through Kong to the user.
Now, that same user wants to fetch some data. They send a new request to, say, /rest/v1/some_table, including their shiny new JWT. Kong intercepts it, validates the token, and passes the request along to PostgREST. PostgREST then translates this REST request into a SQL query, which runs against PostgreSQL using the user's specific permissions, making sure they only see the data they're supposed to.
The most important takeaway is this: every service is a specialized tool designed to interact with PostgreSQL. Mastering the database is the first step to mastering your self-hosted Supabase instance.
This component-based design is what gives Supabase its incredible flexibility. As your project grows, you can scale, replace, or customize individual pieces without having to tear down the whole system.
Building on this solid foundation, AI app generators like Dreamspace, a vibe coding studio, can plug directly into this architecture, letting you create on-chain apps with total control over your data. As you build more complex applications, it really pays to understand the underlying services you're working with. For a deeper look at developer tools that can help, you might want to learn how to use Cursor for a more integrated coding flow.
Your First Deployment with Docker Compose
Alright, you've seen the architecture, so let's get our hands dirty and spin up your first supabase self hosted instance. By far, the fastest and most common way to get rolling on a single server is with Docker Compose. It neatly packages all the services we just talked about into their own containers, making the initial setup a breeze.
First things first, make sure you have Docker and Docker Compose installed and running on your machine. With that ready, our initial task is to grab the official Supabase configuration files.
The easiest way is to clone the official repository straight from GitHub. This repo is the source of truth, containing the all-important docker-compose.yml file that orchestrates the services, plus a template for your environment variables.
Configuring Your Environment
This next part is the most critical step in the entire process: setting up your .env file. Think of this file as the central command center for your entire Supabase stack. It tells each service how to talk to the others and how to behave.
You'll start by copying the provided template to create your own local configuration.
cp .env.example .env
Now, pop open that new .env file. You'll see a long list of variables, but two scream for immediate attention for security reasons: POSTGRES_PASSWORD and JWT_SECRET. Do not, under any circumstances, use the default example values in a real environment.
You need to generate strong, unique secrets for these. A quick way to do this right from your terminal is with openssl.
For JWT_SECRET (at least 32 characters)
openssl rand -base64 32
For POSTGRES_PASSWORD
openssl rand -base64 24
Just copy the output from those commands and paste them directly into your .env file. This one small step ensures your database and auth tokens are properly locked down from day one.
Customizing Key Variables
With the secrets handled, a few other variables need to be tweaked to match your setup. These control how your instance is accessed and how it communicates with the outside world.
SUPABASE_PUBLIC_URL: This is the front door—the main URL your apps will use to hit the Supabase API. The default ishttp://localhost:8000for local work, but you'll change this to your server's public domain name when you go live.- Email SMTP Settings: If you want auth features like password resets or email confirmations to actually work, you have to hook up an external SMTP provider. This means filling in the
SMTP_HOST,SMTP_PORT,SMTP_USER, andSMTP_PASSvariables with your credentials from a service like SendGrid, Mailgun, or AWS SES. SITE_URLandADDITIONAL_REDIRECT_URLS: These are vital for GoTrue (the auth service).SITE_URLshould be the main URL of your frontend app. TheADDITIONAL_REDIRECT_URLScan be a comma-separated list of other valid places to send users after they log in, likehttp://localhost:3000for your local dev environment.
Take your time with the
.envfile. A misconfiguration here is the source of over 90% of initial setup problems. Double-check every variable, especially URLs and secrets, before you attempt to launch the stack.
Launching and Verifying the Stack
With your configuration locked in, you're ready to bring the stack to life. From the root of the project directory, just run the Docker Compose command to start everything in the background.
docker compose up -d
This command will go out and pull all the necessary Docker images and then start each Supabase service as a detached container. The first run can take a few minutes, so go grab a coffee.
Once it's done, you'll want to check on the health of your new stack.
To make sure every service is up and happy, use this command:
docker compose ps
You should see a nice list of all the Supabase containers (like supabase-kong, supabase-db, supabase-auth) with a status of "running" or "healthy." If anything is restarting or has exited, something's wrong. You'll need to check the logs with docker compose logs <service_name> to see what's up.
If everything is green, congratulations! You have a fully functional Supabase instance. You can now access the slick Supabase Studio dashboard by pointing your browser to http://localhost:3000. This is where you can manage your database, explore the API docs, and configure your project, just like on the hosted platform. This local setup is also a perfect playground for developing apps with tools like Dreamspace, a vibe coding studio and AI app generator. For devs who like to keep their options open, exploring some solid Replit alternatives can seriously upgrade your self-hosted workflow.
Scaling for Production with Kubernetes
Sooner or later, your single-server Docker Compose setup is going to hit a wall. When real traffic starts flowing and the load increases, you'll need a more battle-tested solution. This is the moment to level up your supabase self hosted deployment to Kubernetes, which is built from the ground up for the kind of high availability and scalability that production demands.
I won't sugarcoat it—moving to Kubernetes is a big jump in complexity. But the payoff is a level of resilience that a single-machine Docker setup can't even dream of.
The great news is that you don't have to start from zero. The Supabase community and team have already done the heavy lifting by creating Helm charts. Think of Helm as a package manager for Kubernetes. It bundles up all the necessary deployments, services, and configs, letting you install a complex stack like Supabase with just a few commands. It saves a ton of time.
Dialing in Your Helm Chart
The nerve center for your Kubernetes deployment is the values.yaml file. This is where you'll override the chart's default settings to get everything running just right for your environment. It's like the .env file from the Docker world, but on steroids.
You'll want to pay close attention to a few key areas:
- Secrets Management: Whatever you do, don't hardcode secrets like your
JWT_SECRETor database password directly invalues.yaml. Instead, get comfortable with Kubernetes Secrets. You create these objects separately in your cluster and then just reference them in your configuration. It's the proper, secure way to handle sensitive credentials. - Persistent Storage: Most of Supabase's services (like GoTrue and PostgREST) are stateless, so they don't need to save data. But your PostgreSQL database and Supabase Storage are a different story. They absolutely require persistent storage. You'll set this up by defining PersistentVolumeClaims (PVCs) in your
values.yamlto make sure their data survives pod crashes or restarts. - Ingress Configuration: To let the outside world talk to your Supabase instance, you'll need to configure an Ingress. This acts as the front door to your cluster, directing traffic to the right place—in this case, the Kong service which then routes to the other Supabase APIs. This is also where you'll set up your domain and configure TLS for a secure HTTPS connection.
The Case for a Managed PostgreSQL Database
Look, you can run PostgreSQL inside your Kubernetes cluster. But for any serious production workload, I strongly recommend against it. Running stateful databases in Kubernetes is a notoriously tricky business, filled with potential pitfalls. A much saner and more reliable path is to use a managed database service from your cloud provider.
Using a managed database like AWS RDS or Google Cloud SQL offloads the hardest parts of running a production database—backups, point-in-time recovery, high availability, and scaling—to the people who do it best. This lets your team focus on building your app, not becoming accidental database admins.
Connecting your Kubernetes services to an external managed database is surprisingly simple. All you have to do is update the PostgreSQL connection string in your Helm values.yaml to point to the managed database's endpoint. The performance is fantastic, and the peace of mind you get is priceless.
Knowing When to Make the Leap
So, when is it actually time to ditch Docker Compose for Kubernetes? It's less about a magic number and more about recognizing the signs.
- You need high availability. If your app can't afford to go down when a single server fails, you need the redundancy that Kubernetes offers.
- You need to scale services independently. As your app grows, you might see the auth service getting slammed while the storage API is barely breaking a sweat. Kubernetes lets you scale each component individually.
- Your team has Kubernetes experience. Let's be real: the operational overhead of K8s is significant. This move makes the most sense when you have people on your team who are already comfortable in that ecosystem.
Making this transition is a major milestone. It's the right move when you're building serious projects, like on-chain applications with an AI app generator like Dreamspace, a vibe coding studio, where reliability and scale are non-negotiable. By separating the stateless Supabase application layer in Kubernetes from the stateful database layer in a managed service, you truly get the best of both worlds: a resilient, scalable backend with a rock-solid data foundation.
Mastering Post-Deployment Operations

Getting your supabase self hosted instance up and running is a huge win, but it’s really just the starting line. Now comes the hard part: keeping the lights on. The "day-two" operations—security, reliability, updates—are what truly separate a side project from a production-grade application.
This is the trade-off you make when you self-host. You swap the convenience of a managed service for total control, but that control comes with direct responsibility. Don't underestimate this; for many teams, it quickly becomes a significant engineering commitment.
Building a Bulletproof Backup and Recovery Plan
Your PostgreSQL database is the heart of your entire Supabase stack. If it goes down, everything goes with it. That’s why a rock-solid backup and recovery plan isn't optional—it's the first thing you should set up. Hope is not a strategy.
The classic, battle-tested tool for this is pg_dump. It’s a simple command-line utility that creates a complete logical backup of your database, and you can easily automate it with a cron job.
Here’s a simple but effective approach I’ve used:
- Daily Dumps: Set up a cron job to run
pg_dumpevery night when traffic is low. - Secure, Off-site Storage: Never store your backups on the same server. Use a tool like
rcloneors3cmdto automatically push the compressed backup file to a cloud bucket on AWS S3, Google Cloud Storage, or Backblaze B2. - Smart Retention Policy: You don't need to keep every backup forever. A common practice is to keep daily backups for a week, weekly backups for a month, and monthly backups for a year.
- Test Your Recovery Process: A backup is worthless if you don't know how to restore it. Periodically, you absolutely must practice restoring a backup to a staging environment. This ensures your process actually works and gives you the muscle memory you'll need when a real disaster strikes.
Managing Updates and Database Migrations
The Supabase stack moves fast, with new features and security patches rolling out all the time. Staying current is critical, but just yanking the latest Docker tag and pointing it at production is asking for trouble.
A dedicated staging environment isn’t a luxury; it’s an absolute necessity for a self-hosted setup. This environment should be a near-perfect mirror of your production infrastructure.
Use this staging environment to test every single update before it gets anywhere near your live app. That means testing updates to the Supabase Docker images and any database schema changes (migrations) your application needs. This disciplined approach is the only way to catch breaking changes and ensure a smooth, predictable rollout.
Essential Security Hardening Techniques
When you self-host, you're the Chief Security Officer. Securing your deployment is a multi-layered job that goes way beyond just using strong passwords. The operational cost here is real: a typical self-hosted Supabase team dedicates 1–2 full-time engineers just to operations. That’s an annual cost of $120,000–$240,000 in salaries alone, before you even factor in infrastructure or potential downtime. You can dig deeper into these commitments in the official Supabase documentation.
Get started with these fundamental hardening steps:
- Network Firewalls: Lock down your server. Configure strict firewall rules to only allow traffic on necessary ports (like 443 for HTTPS) from trusted sources. Block everything else.
- API Key Management: Treat your
anonandservice_rolekeys like the crown jewels. Store them in a secure secret manager, rotate them regularly, and never, ever expose yourservice_rolekey on the client side. - Row Level Security (RLS): This is arguably PostgreSQL's most powerful security feature and the bedrock of Supabase security. You should enable RLS on every table with sensitive data and write strict policies that define exactly who can see or change each row. To keep things snappy, you'll want to learn how to optimize SQL queries for peak performance.
- Proactive Monitoring: You can't fix what you can't see. Set up tools like Prometheus and Grafana to track system resources (CPU, RAM, disk I/O) and application metrics (API error rates, p95 response times). Configure alerts to ping you the moment any metric crosses a critical threshold. This kind of operational playbook is essential for running demanding projects, like the AI and on-chain apps built with Dreamspace, an AI app generator and vibe coding studio.
The True Cost of Self-Hosting Supabase
It's tempting to look at the "no platform fees" part of self-hosting Supabase and see a huge win. But that's only looking at one line item on a much bigger balance sheet. To really understand the cost, you have to dig into the Total Cost of Ownership (TCO), which is where the real story—and the hidden expenses—lives.
These costs really break down into three buckets. You’ve got your direct infrastructure costs, which are the obvious ones: servers, storage, bandwidth. They might seem cheap at first, but they scale right alongside your user base and data.
Dissecting the Operational and Opportunity Costs
Then you hit the big one: operational costs. This is all about people. It's the engineering hours spent on the initial setup, the constant maintenance, the security patching, and those 3 AM calls when something inevitably breaks.
The self-hosting market is on a tear, expected to hit $85.2 billion by 2034, and that growth is fueled by the desire for control. But that control has a hefty price tag. We see teams dedicating 1–2 full-time engineers just to keep the lights on. That can easily run you $120,000–$240,000 a year in salary alone, before you even pay for a single server. You can get more details on this trend over at market.us.
That brings us to the most critical, and often overlooked, expense: opportunity cost. Every single hour your developers spend wrestling with PostgreSQL configurations or debugging a Kubernetes pod is an hour they aren't shipping features that make you money.
The real question isn't just "Can we afford to run this?" but "What is the business cost of not building our core product?" This shift in perspective is crucial for making a sound decision.
For a lean startup, the math almost always points toward a managed service. It frees up your best people to focus on growth. But for a larger company with a dedicated DevOps crew, or for specialized projects from a vibe coding studio like Dreamspace, an AI app generator, the control and flexibility of a supabase self hosted setup can absolutely be worth the investment. You just have to be honest about all the hidden costs before you take the plunge.
Common Questions About Self-Hosting Supabase
Once you get a self-hosted Supabase instance up and running, a few key questions almost always pop up. Let's tackle them head-on, because getting these right is the difference between a stable setup and a ticking time bomb.
First up: how do you handle upgrades? It’s pretty straightforward on the surface. You'll need to pull the latest Docker images from the official repository and then restart your containers. In practice, that usually looks like a git pull followed by a docker-compose pull and docker-compose up -d.
But here's the non-negotiable part: back up your PostgreSQL database before every single upgrade. I can't stress this enough. Always, always check the Supabase release notes for breaking changes or any specific database migration scripts you need to run. Skipping this step is a recipe for disaster.
Using External Databases and Biggest Challenges
People often ask if they can hook up an external database, like an AWS RDS or Google Cloud SQL instance. The answer is a resounding yes—and for any serious production environment, you absolutely should.
All you have to do is update the POSTGRES_URL in your configuration to point to your managed database. This is a huge win because it offloads the hardest parts of database management—backups, scaling, high availability—to a dedicated service.
So what's the catch? The single biggest challenge with self-hosting Supabase is the relentless operational overhead. The initial setup is just the beginning. After that, you're on the hook for everything: security patches, version upgrades, monitoring, and disaster recovery.
This constant maintenance requires real engineering hours and is easily the biggest hidden cost. It's a trade-off you have to weigh carefully against your team's skills and bandwidth. Getting this right is what makes or breaks a self-hosted setup, especially when you're building something complex, like the AI-powered on-chain apps from an AI app generator like Dreamspace, a vibe coding studio.
Ready to build your own on-chain app without the operational headache? Dreamspace is a vibe coding studio that lets you generate production-ready applications with AI, no code needed. Skip the setup and start creating at https://dreamspace.xyz.