
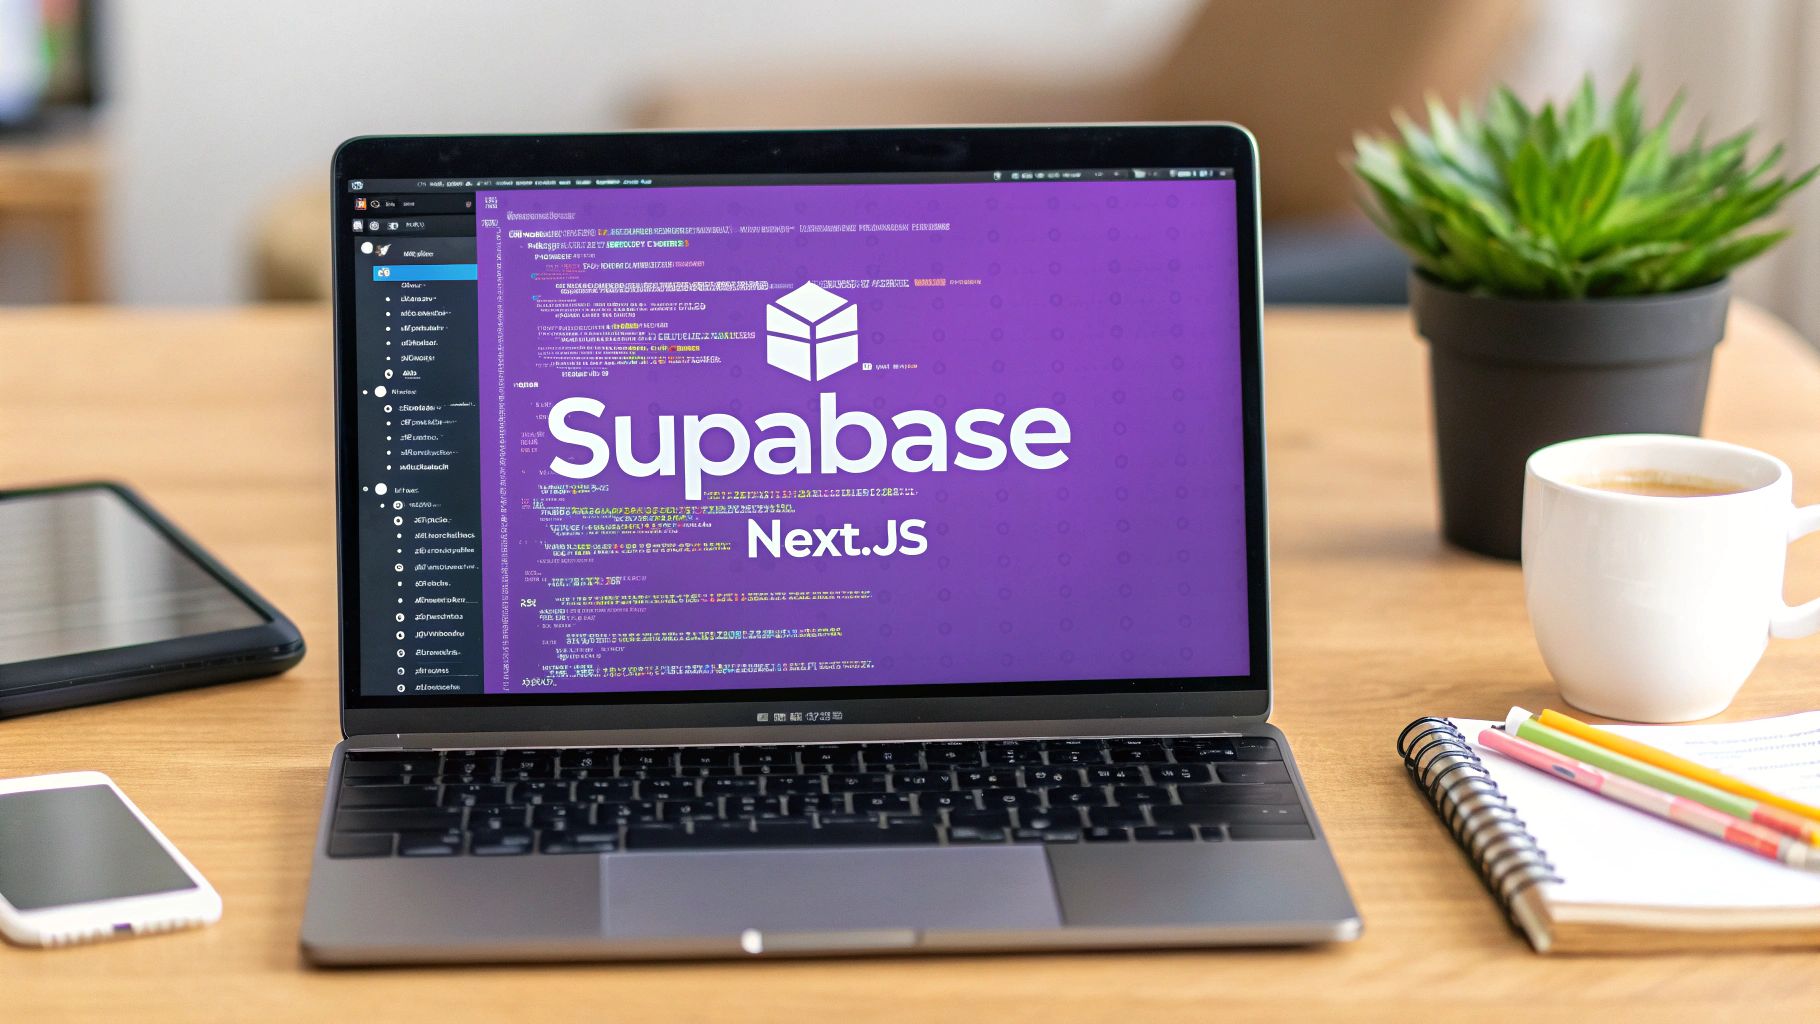
A Modern Guide to Building Apps with Supabase Next JS
If you want a shortcut to building seriously high-performance, full-stack applications without the usual headache, pairing Supabase with Next.js is the way to go. It's a combination I've come to rely on heavily. You get the best of both worlds: Next.js's incredible frontend power, like server-side rendering, fused with Supabase's all-in-one backend.
Think about it—a managed Postgres database, authentication, and even realtime features, all ready to go.
Why Supabase and Next JS Are a Perfect Match

The real beauty of this stack is how it bridges that classic gap between a slick frontend and a solid backend, but without all the painstaking configuration. Next.js is a beast at creating fast, SEO-friendly UIs. Supabase, on the other hand, just hands you all the backend services you need on a silver platter. This duo just makes the whole development lifecycle simpler.
Here at Dreamspace, our AI app generator runs on this exact stack. It lets us spin up complex apps with secure backends and fantastic user experiences incredibly fast. We’re talking about moving from a basic idea to a full-blown production app way faster than we ever could with traditional, piecemeal approaches.
The Core Strengths Combined
The magic really clicks when you see how their features just... fit. Instead of duct-taping different services for your database, auth, and file storage, you have a single, unified solution that feels like it was designed to work together from day one.
This means you can build scalable and secure apps with way less boilerplate code. The benefits are impossible to ignore:
- Go Faster: You can genuinely get a full-stack app off the ground in a matter of hours, not weeks.
- Wickedly Performant: Combine Next.js's server-side rendering with Supabase's snappy database queries for a great user experience.
- No More Backend Headaches: Supabase takes care of the database, auth, and storage infrastructure so you can focus on your app.
To give you an idea of how this combination works in practice, here’s a quick breakdown of how their features complement each other.
Supabase & Next JS Synergy at a Glance
Ultimately, this table shows a clear pattern: Next.js handles the what and how of the user interface, while Supabase provides the secure and scalable data to power it.
This isn't just some niche trend, either. The industry is catching on fast. Recent data shows over 17,921 verified companies are using Next.js, including giants like Apple and Microsoft. Its proven strengths in performance and SEO are a natural fit for Supabase's managed backend.
This stack is a practical, powerful solution to real-world development problems. By combining a top-tier frontend framework with an integrated backend platform, you cut out the friction and get to focus on what actually matters: building great features.
This approach is all about efficiency, much like the principles behind other modern development methods. If you're interested in speeding up your workflow even more, check out our guide on the principles behind no-code development.
Kicking Off Your Supabase and Next.js Project

Alright, let's get our hands dirty. Turning that big idea into actual code starts with a solid foundation, and thankfully, getting a Supabase Next.js project off the ground is surprisingly quick. You'll spend less time fighting with config files and more time actually building.
It all starts in the Supabase dashboard. If you don't have an account, grab one. Once you're in, just hit "New Project," give it a name, set a strong database password, and pick a server region close to your users. Supabase works its magic behind the scenes, spinning up a full Postgres database and generating your API keys in just a couple of minutes.
As you get started, it's a good idea to think about strategies for building an MVP. This tech stack is perfect for that lean approach, helping you focus on shipping core features fast.
Scaffolding the Next.js App
With the backend ready to go, it's time to create our frontend. The best way to spin up a new Next.js app is with their official command-line tool. Just pop open your terminal and run this:
npx create-next-app@latest my-supabase-app
This command kicks off a handy interactive setup. It'll ask you about things like using TypeScript (yes, you should), Tailwind CSS, and the App Router. For any modern build, I highly recommend sticking with the App Router. Once that finishes, you've got a clean, production-ready Next.js project sitting in a new folder.
Now, we just need to connect the two. This means pulling in the Supabase client libraries that will act as the bridge between your app and the backend.
- @supabase/supabase-js: This is the main library. It’s what you’ll use for pretty much everything—database queries, auth, storage, you name it.
- @supabase/ssr: This is a newer, incredibly useful helper library made specifically for frameworks like Next.js. It makes handling auth on both the client and the server a whole lot easier.
You can install them both with a single command in your project directory: npm install @supabase/supabase-js @supabase/ssr. If you're completely new to this whole process, our guide on how to create your own app can give you a broader overview.
Locking Down Your API Keys
This part is non-negotiable: never, ever hardcode your API keys directly into your code. Your Supabase project gives you two crucial pieces of info: a Project URL and an anon key. These need to be kept secret.
The right way to handle this is with environment variables. In the root of your Next.js project, create a new file and name it .env.local. This file is automatically ignored by Git, so you won't accidentally commit your secrets to a public repository.
Inside that .env.local file, add your two keys like this:
NEXT_PUBLIC_SUPABASE_URL=YOUR_SUPABASE_PROJECT_URLNEXT_PUBLIC_SUPABASE_ANON_KEY=YOUR_SUPABASE_ANON_KEY
Critical Tip: That
NEXT_PUBLIC_prefix is absolutely essential. It’s a Next.js convention that tells the framework it's safe to expose these variables to the browser. The Supabase client running on the user's device needs them. For any secret keys that should only live on the server, you would leave that prefix off.
And that's it! Your project is now securely connected and ready for you to start building. We've laid the groundwork for adding authentication and fetching data, which is exactly where we're headed next.
Putting Robust User Authentication Flows in Place
Let's be honest, handling user authentication is one of those non-negotiable parts of building any real-world app. It used to mean days, even weeks, of tedious boilerplate. Thankfully, with the Supabase and Next.js combo, we can skip all that and get right to the good stuff. Supabase Auth gives you a secure, full-featured solution that just clicks with the Next.js ecosystem, handling everything from a simple sign-up form to tricky server-side session management.
This pairing has become a massive favorite in the dev community for a reason. By 2025, Supabase had scaled up significantly, cementing itself as a go-to for startups and companies that need to move fast without sacrificing the power of server-side rendering. The numbers speak for themselves—their 2025 Wrapped report showed over 15 million distinct developer actions, which tells you just how huge and active the user base is. You can see the full breakdown on the official Supabase Wrapped report.
Client-Side Authentication with Supabase Helpers
The first place your user interacts with auth is on the front end—think sign-up and login forms. In a Next.js app, this is prime territory for Client Components. The @supabase/ssr helper library is a lifesaver here, giving you hooks and methods that make managing the user session in the browser almost effortless.
For instance, a login form boils down to a simple async function that calls supabase.auth.signInWithPassword(). Want to add social logins? A single line of code for Google or GitHub can trigger the whole OAuth flow without you having to touch a single piece of complex backend configuration.
'use client'
import { createClient } from '@/utils/supabase/client'
import { useState } from 'react'
export default function LoginForm() {
const [email, setEmail] = useState('')
const [password, setPassword] = useState('')
const supabase = createClient()
const handleSignIn = async (e) => {
e.preventDefault()
await supabase.auth.signInWithPassword({
email,
password,
})
// Add router push and error handling
}
const handleGitHubLogin = async () => {
await supabase.auth.signInWithOAuth({
provider: 'github',
options: {
redirectTo: ${location.origin}/auth/callback,
},
})
}
// ... JSX for the form
}
With this setup, your UI stays snappy and interactive, while Supabase does all the heavy lifting with token management and security behind the scenes.
Securing Routes with Server-Side Logic
Now for the really powerful part: protecting routes and grabbing user-specific data on the server. Next.js Middleware is the perfect spot to manage session cookies and bounce any unauthenticated users. Using the @supabase/ssr helper, you can spin up a server-side Supabase client right in your middleware.ts file. This lets you check for an active user session on every single request that hits your protected routes.
By putting your session validation right in the middleware, you create one central checkpoint for all your authentication logic. It’s a clean and simple way to lock down entire sections of your app, like a user dashboard, and make sure no one gets in who isn’t supposed to.
Once a user is logged in, you can securely fetch their private data from inside Server Components or Route Handlers. You just create a server client and query Supabase for data tied to that specific user, which is all enforced by Postgres Row Level Security (RLS) for rock-solid access control. This server-side approach is key—it guarantees that sensitive information never even makes it to the client's browser.
Of course, authentication is just one piece of the puzzle. To really build a secure application, it’s worth diving into broader software development security best practices.
Mastering Data Fetching Across Your Application
Once your users are logged in, the real fun begins: getting data into their hands. The great thing about the Supabase and Next.js stack is its flexibility. You're not boxed into one way of doing things. You get to pick the right tool for the job, whether you're building a super interactive dashboard or a blazing-fast, server-rendered page.
How and where you decide to fetch data really matters. It's the difference between a sluggish app and a snappy one, and it has major implications for security and the overall user experience. The trick is knowing the strengths of each approach within the Next.js App Router.
Client Components for Interactive Data
When you need that instant feedback—like a search bar filtering results as you type or a form validating input on the fly—Client Components are your best friend. With the Supabase client-side helper, you can run CRUD (Create, Read, Update, Delete) operations straight from the user's browser.
This is perfect for our on-chain data tracker. Imagine a user wanting to add a new wallet to their watchlist. They paste in the address, hit "Save," and a client-side function zips the request off to Supabase. The UI updates immediately, giving them that quick, responsive feel we all love.
Server Components for Performance and Security
Now, for loading the initial state of a page, Server Components are the clear winner. By fetching data on the server before the page even hits the browser, the user gets a fully rendered HTML document right away. This makes your app feel incredibly fast and gives you a nice SEO boost.
When a user lands on their dashboard in our tracker app, we can use a Server Component to pull their entire list of tracked wallets. All the database logic and credentials stay safely on the server, so you never have to worry about exposing sensitive info on the client.
To help you decide which path to take for user actions, here’s a decision tree that breaks down when to use server-side versus client-side auth logic.
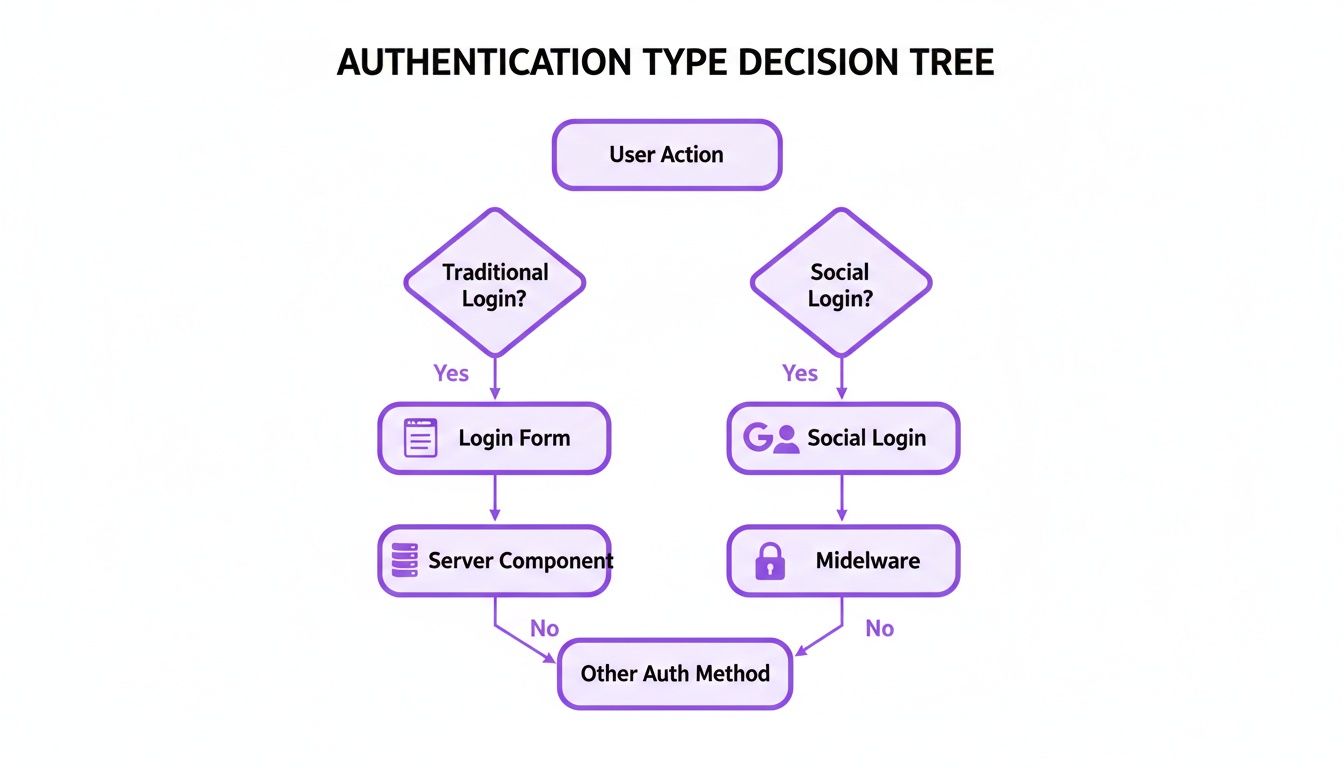
As the flow shows, client-side actions like social logins often run through middleware, but you can securely handle direct form submissions right inside Server Components. This keeps the logic contained and super efficient.
Server Actions and API Routes for Backend Logic
So, what about the heavier lifting? For more complex operations, Server Actions and API Routes (also called Route Handlers) are your backend workhorses. They’re ideal for handling form submissions, running multi-step database transactions, or talking to third-party APIs.
For instance, when a user wants to refresh the transaction data for a wallet, a form submission could trigger a Server Action. This action would then hit Supabase for the latest on-chain data, update your database, and revalidate the page cache to show the fresh information. It’s a clean pattern that keeps your frontend simple and pushes the complex logic to the server where it belongs.
Key Takeaway: The strategy is simple. Use Client Components for instant interactivity, Server Components for initial page loads and secure data fetching, and Server Actions or API Routes for mutations and complex backend tasks. This layered approach gives you the best of all worlds.
In the wild, most projects mix and match these methods. They'll use Supabase's managed PostgreSQL for relational data, its Realtime features for live updates, and Edge Functions for serverless logic to build a complete, robust application.
For developers looking to move even faster, AI tools can be a game-changer. At Dreamspace, we're an AI app generator and vibe coding studio focused on helping you build onchain apps in a fraction of the time. If you want to supercharge your own setup, check out our post on how to use Cursor with AI for some cool tips.
Bringing Your App to Life with Realtime Updates and Serverless Functions

Displaying static data is one thing, but modern apps feel alive. This is where a Supabase Next.js stack truly shines—letting you breathe life into your UI with realtime updates. The magic here is that Supabase exposes PostgreSQL's built-in replication features through a dead-simple JavaScript API.
Forget forcing users to constantly hit refresh. You can subscribe to database changes directly from your Next.js components. This lets you listen for new rows, updates, or deletions on any table and instantly push those changes to every connected client.
Think back to our on-chain data tracker. When a new transaction hits the transactions table, every user sees it pop up on their screen immediately. No page reload, no waiting. It's this kind of immediate feedback that creates a truly engaging and dynamic experience.
Handling Backend Logic with Supabase Edge Functions
Sooner or later, you'll need backend logic that just doesn’t belong on the client. For this, we turn to Supabase Edge Functions. These are serverless Deno functions that you can deploy right alongside your database for all sorts of backend tasks.
Because they’re deployed at the edge and live right next to your data, they are wickedly fast and perfect for things like:
- Third-Party Integrations: Firing off a notification to Discord or Slack whenever a specific event happens in your database.
- Complex Business Logic: Processing a Stripe payment and then updating multiple tables in one atomic transaction, ensuring data integrity.
- Data Webhooks: Creating an endpoint to catch data from an external service and pipe it directly into your Postgres tables.
Getting started is a breeze with the Supabase CLI, which lets you scaffold, test, and deploy functions right from your terminal.
This keeps your serverless logic neatly version-controlled with the rest of your Next.js application code, which is a huge win for keeping your project clean as it scales.
Edge Functions offer all the power of a traditional backend without any of the server management headaches. They're an indispensable part of the modern developer's toolkit, especially for handling event-driven tasks or secure operations that need to be tucked away from the client.
Common Questions About Supabase and Next JS
When you're deep in the code, a few questions always seem to pop up. Getting a straight answer can be the difference between a quick win and a few hours of head-scratching. Let's tackle some of the most common things developers ask when pairing Supabase with Next JS.
A big one is server-side rendering (SSR). How do Supabase and Next.js play together? The answer: incredibly well. You can use the Supabase JS library right inside Next.js Server Components or even older patterns like getServerSideProps to pull data before a page ever hits the browser.
This means you send a fully-formed HTML page to the user, which is a massive boost for both initial load times and SEO. The trick is to use the server-side client from the @supabase/ssr helper library—it’s built specifically to handle auth and session state correctly on the server.
How Should I Manage Database Migrations?
This is a huge one. For any project that isn't just a weekend prototype, you need a solid plan for database migrations. The gold standard here is the Supabase CLI. It's a command-line tool that lets you treat your database schema just like the rest of your code: as something you can version control.
Instead of clicking around in the Supabase dashboard to make schema changes (which is fine for early fiddling), the CLI gives you a much safer workflow for production.
- Generate migration files: Change your local database, and the CLI creates a SQL file documenting that exact change.
- Apply migrations: Run a command to apply those same SQL files to your staging and production databases. It’s controlled and repeatable.
This whole process stops your different environments from drifting apart. It’s how you ensure that the database your teammate is working on has the exact same structure as your production environment.
A disciplined migration workflow is non-negotiable for collaborative projects. It's what prevents the dreaded "it works on my machine" problem by making sure every developer and every environment shares the exact same database structure.
Is Supabase Ready for Enterprise Applications?
Absolutely. Supabase has grown up fast and is now a serious contender for enterprise-level applications. The whole thing runs on AWS infrastructure, giving you the reliability and scale you need for a demanding project.
Beyond that, Supabase has added critical enterprise features like SOC2 Type 2 compliance and offers dedicated support plans for bigger teams. Its use of PostgreSQL’s Row Level Security (RLS) is a game-changer, providing the kind of granular, policy-based access control that’s a must-have for enterprise-grade security. This blend of scalability, security, and clear pricing makes it a very strong choice for mission-critical apps.
Ready to stop wiring things together and start building? At Dreamspace, we use AI to help you generate production-ready onchain apps in a fraction of the time. Think of us as your vibe coding studio, taking your idea from concept to a live website with smart contracts and blockchain data queries, no code needed. Skip the boilerplate and start creating today. https://dreamspace.xyz