
How to Add Collaborators in GitHub A Guide for Dev Teams
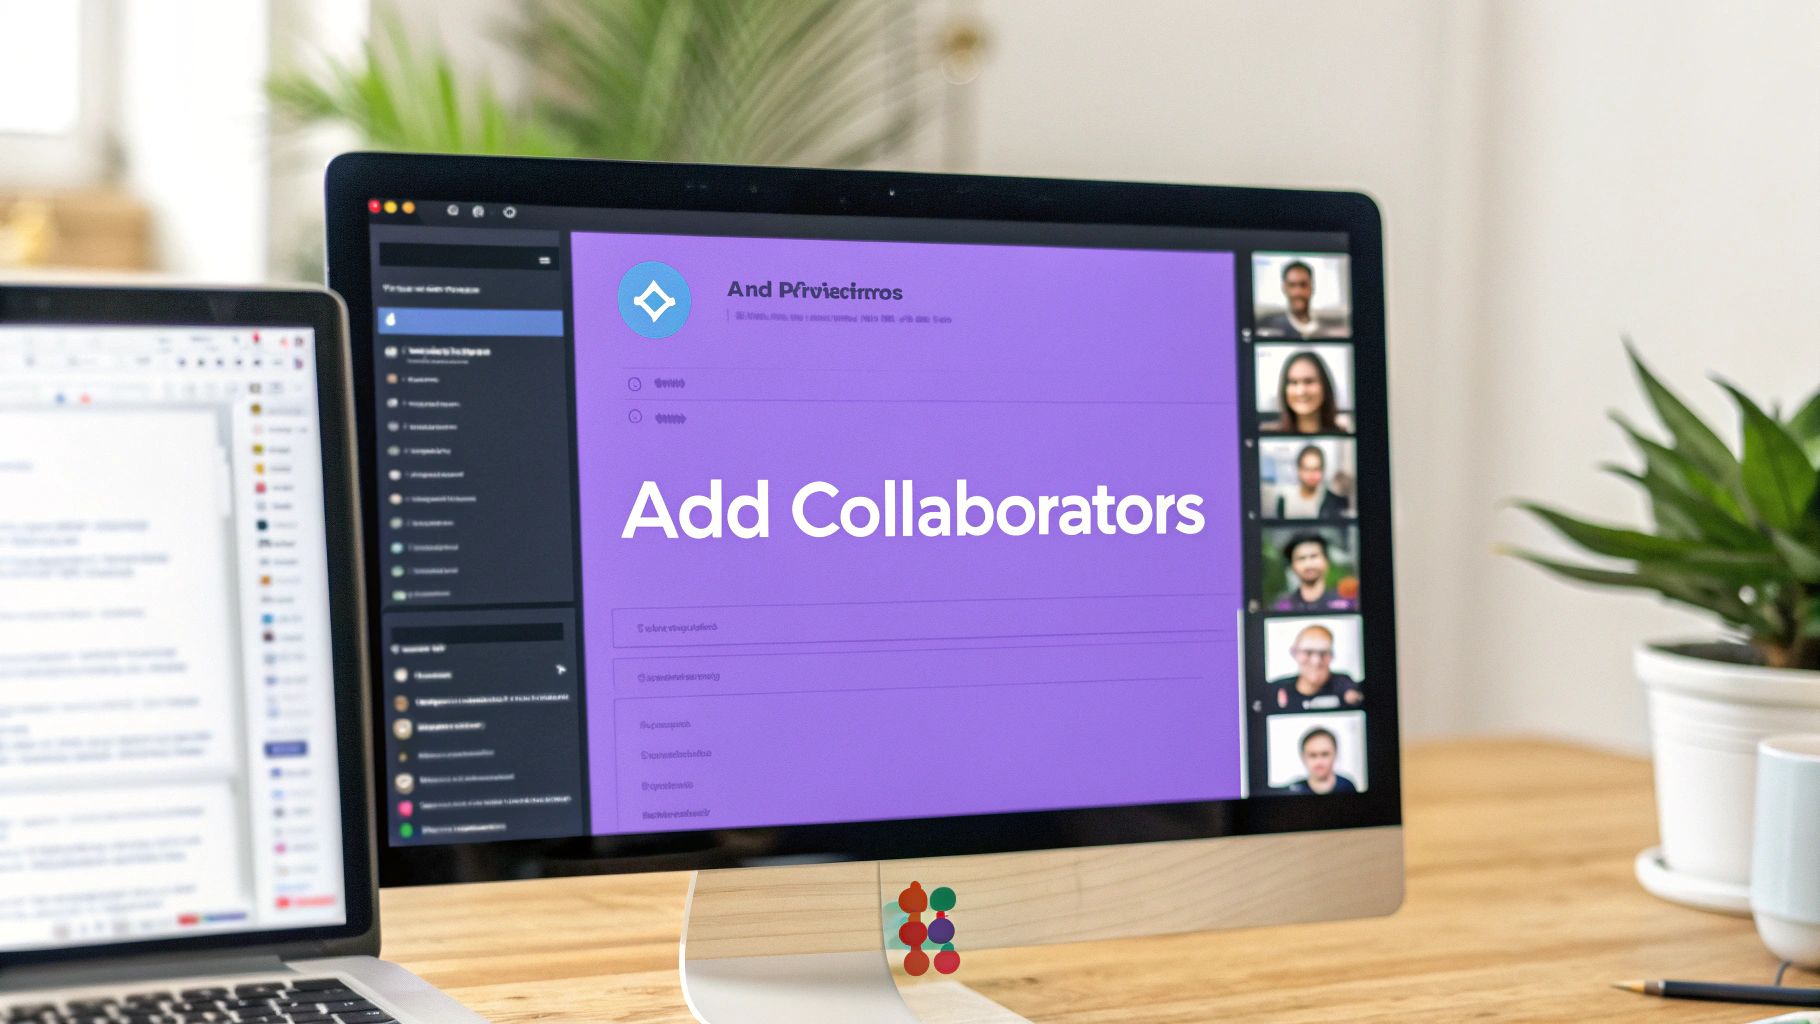
Ready to turn your solo project into a team effort? Adding a collaborator in GitHub is the first real step, and thankfully, it's something you can knock out in less than a minute. All it takes is a quick trip to your repository's Settings, a click on Collaborators, and then you just pop in their GitHub username or email to send off an invite. Just like that, they're in and ready to contribute.
Understanding GitHub Collaboration

Knowing how to add people to your repo is fundamental. It’s what transforms your private workspace into a shared, living development environment. Suddenly, your teammates can push code, scrutinize changes, and help manage the project's direction, all from within the same repository. It doesn't matter if it's an open-source library or a private app—this is the heartbeat of modern software development.
This becomes especially critical when you're building with tools on the cutting edge. Take Dreamspace, for example. Teams using this vibe coding studio often generate entire onchain apps or smart contracts with AI. To get from a cool idea to a working product, everyone needs access to the same codebase to tweak, test, and build upon it. Layering in solid Version Control Best Practices is non-negotiable for keeping things from getting chaotic.
Why Collaboration Matters
Bringing teammates into your repo does more than just share some files; it kickstarts a system for building better software, together. It’s about creating a flow that accelerates development and seriously bumps up code quality.
Here's what you unlock:
- Parallel Development: Get more done, faster. Multiple developers can tackle different features at the same time, which can slash your project timeline.
- Code Reviews: This is huge. Collaborators can review each other's pull requests, which is your best defense against bugs and messy code before it ever touches the main branch.
- Shared Ownership: When a team works on a repository together, it builds a collective sense of ownership. Everyone is invested in the project's success.
- Knowledge Transfer: It’s a fantastic way for junior developers to learn directly from more senior members by seeing their code and getting direct feedback.
By mastering the simple process of adding a collaborator, you unlock the full potential of distributed version control, turning Git from a personal backup tool into a powerful platform for team-based innovation.
In this guide, we'll walk through all the ways to add collaborators—from the simple web interface to the more powerful command-line and API methods. You can see how these workflows fit into a modern dev stack by checking out our post on the benefits of an AI-powered coding assistant.
Adding Collaborators Through the GitHub Interface
The simplest, most common way to get a teammate into your repository is right through the GitHub website. It’s a visual, point-and-click process that nearly every developer learns first.
This is the perfect method for granting access on the fly without ever touching the command line. It’s approachable for everyone on your team, from senior devs to non-technical project managers.
For teams building with an AI app generator like Dreamspace, this is your bread and butter. After the AI scaffolds the code for your new onchain app or smart contract, this is exactly how you’ll bring in your crew to start building.
Finding Your Repository Settings
First things first, head over to the main page of the repository you want to share. Look for the Settings tab along the top navigation bar—it's usually right there next to "Code," "Issues," and "Pull Requests."
Clicking "Settings" takes you to the general configuration page. Now, look to the menu on the left. This is your control panel for the whole project. You're looking for the Collaborators tab, which lives under the "Access" section.
Sending Out the Invite
Once you're on the "Collaborators" page, you've found the central hub for managing access. Here, you can see who’s already in, remove old members, and add new people.
To invite someone, click the big green Add people button. A search box will pop up.
You can find the person you're looking for by their:
- GitHub username
- Full name (as it appears on their profile)
- Email address tied to their GitHub account
Type in their info, select the right person from the list, and GitHub will then prompt you to choose a permission level for them. Send the invite, and they’ll show up in a "Pending invites" list until they accept. Simple as that.
This is what that "Collaborators and teams" settings page looks like, with the "Add people" button ready to go.
What Your Collaborator Sees
On their end, the process is just as straightforward. Your new teammate will get an email from GitHub letting them know you've invited them. The email has a link that takes them directly to the invitation.
If they miss the email, no worries. They'll also see a notification right on their GitHub dashboard. All their pending invites are collected at github.com/notifications/invites. One click on "Accept invitation," and they're in.
From sending the invite to them getting access, the whole thing can take less than a minute. For fast-moving teams that need to get people onboarded and back to work, this speed is a lifesaver.
A Quick Note: Personal vs. Organization Repos
There’s one important distinction you need to know: adding someone to a personal repository is different from adding them to one owned by an organization.
- Personal Repositories: When you invite someone, they become a collaborator. They get direct access to that one specific repository, and that's it.
- Organization Repositories: If you invite someone who isn't already a member of your GitHub organization, they are considered an outside collaborator. This is a great security feature. It gives them laser-focused access only to the specific repositories you invite them to, keeping the rest of your organization's code private. Organizations also lean heavily on "teams" to manage access, letting you grant permissions to entire groups at once.
Understanding Collaborator Roles and Permissions
Granting access is one thing, but granting the right access is a cornerstone of project security and team efficiency. Once you figure out how to add someone to your repo, the next critical step is assigning them a role that perfectly matches their responsibilities—no more, no less. This simple act prevents accidental deletions, unauthorized merges, and keeps your project's integrity locked down.
This decision tree can help you quickly figure out where to start.
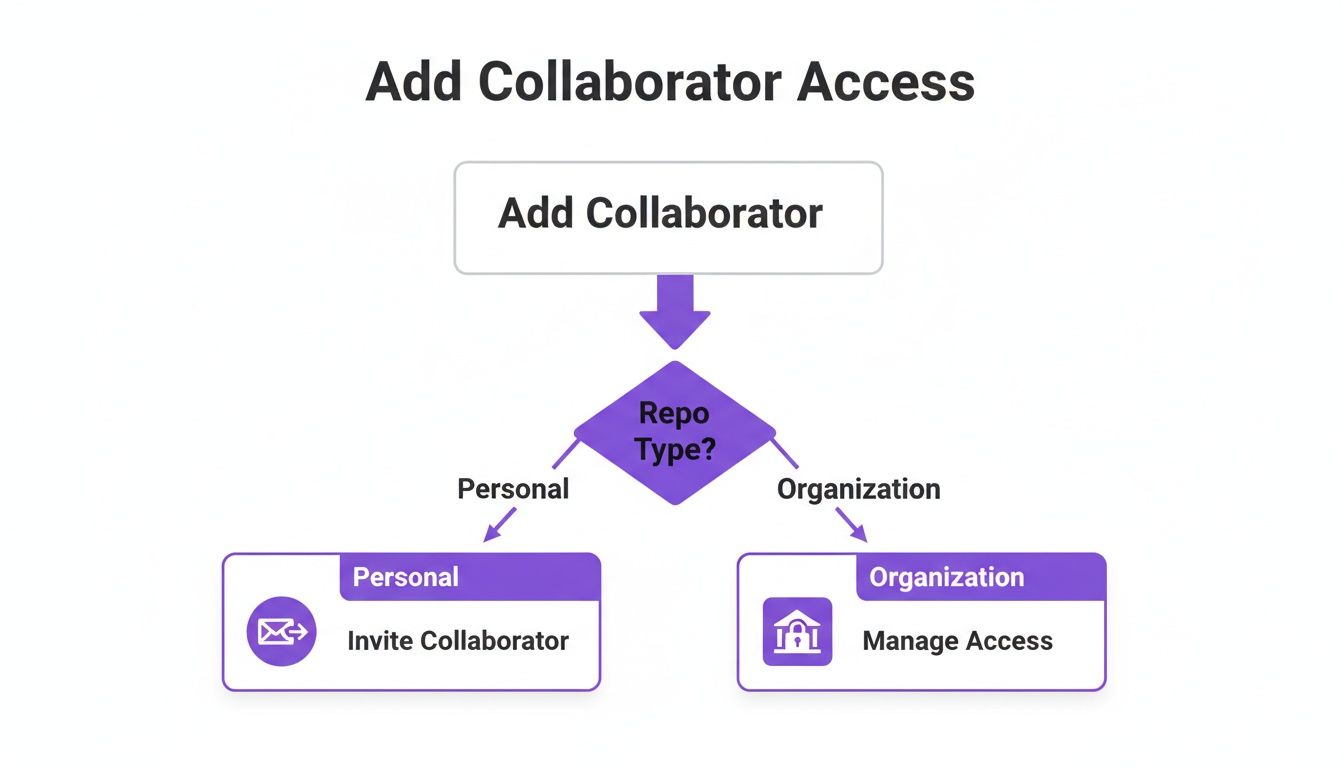
The flowchart makes it clear: the path you take depends entirely on whether your repository is personal or part of an organization. It's a quick visual guide to get you to the correct access management screen.
Decoding the Five Access Levels
GitHub gives you five distinct roles for personal repositories. I like to think of them as different keycards for your project, each unlocking only the necessary doors.
Read: This is your basic "look, don't touch" access. Collaborators can see the code, open and comment on issues, and check out pull requests. It's perfect for a project manager who needs to track progress or a stakeholder who just needs to follow along.
Triage: This level includes everything from Read access, plus the ability to manage issues and pull requests by adding labels or assigning reviewers. This is a great fit for a QA lead or a community manager who helps organize bug reports without pushing any code themselves.
Write: This is the standard-issue role for most developers on a project. It grants all the Read and Triage permissions, but crucially, it lets them push their own changes to the repository. If someone is actively writing and contributing code, they’ll need Write access.
Maintain: A step up from Write, this role is for trusted team members who help manage the repository day-to-day. They can do everything a writer can, plus edit the repository's description, topics, and release pages. They can’t, however, access sensitive settings like secrets or security configurations.
Admin: This is the master key. Admins have full control over the repository. They can manage collaborators, change all repository settings, set up branch protection rules, and even delete the entire repo. You should reserve this role for the project lead or the repository owner.
Practical Scenarios for Role Assignment
Let's ground this in a real-world context. Imagine your team just used the Dreamspace AI app generator to scaffold a new onchain application. The initial code is there, and now it's time to bring in the team.
Your lead developer, who will oversee the entire project and manage security, obviously gets Admin access. The two front-end developers building out the UI are given Write permissions so they can push their code. A project manager who just needs to track progress without getting their hands dirty gets Read access.
This tiered approach ensures everyone has the tools they need to do their job without exposing your smart contract logic to unnecessary risk.
The Principle of Least Privilege is your best friend here. Always grant the minimum level of access a collaborator needs to get their work done. You can always bump up their permissions later if their role expands.
Advanced Collaboration with the CLI and API
While the GitHub web interface is great for firing off a quick invite, developers who basically live in their terminal have much more direct, scriptable options. The GitHub Command Line Interface (CLI) and its powerful API let you manage repository access without ever leaving your development environment.
These methods are perfect for building smoother workflows, especially for teams who are all about speed and efficiency. If you’re using something like Dreamspace, a vibe coding studio, to spin up new onchain apps, automating how you add collaborators can be a massive time-saver.
Using the GitHub CLI for Quick Invites
If you haven't installed it yet, the GitHub CLI (gh) is a must-have. It brings pretty much all of GitHub's functionality straight into your terminal, and it feels like a superpower once you get the hang of it.
Adding a collaborator is as simple as running a single command. Just cd into your local repo's directory and use the gh repo add-collaborator command.
Let's say you want to add a user named dev-teammate to your project. The command is short and sweet:
gh repo add-collaborator dev-teammate --permission write
That one line sends an invitation to dev-teammate and gives them write access the moment they accept. You can easily swap out write for other permission levels like read, triage, maintain, or admin to get the role just right. It's a ridiculously fast way to manage access without breaking your focus. For more on modern dev environments, you might find our guide on alternatives to popular online IDEs interesting.
Programmatic Access with the GitHub API
For the ultimate level of control and automation, the GitHub API is your best friend. The API lets you manage collaborators programmatically, which is perfect for custom scripts, automated onboarding, or even building a custom dashboard. You can use simple tools like curl or any programming language you're comfortable with to make the HTTP requests.
Tapping into the GitHub API transforms collaborator management from a manual chore into a fully automated process. This is absolutely key for scaling teams and weaving repository access into your larger company workflows.
To add a collaborator using curl, you'll first need a Personal Access Token (PAT) with the repo scope. Think of this token as your password for the API.
The API endpoint you need is PUT /repos/{owner}/{repo}/collaborators/{username}. Here’s a quick curl example that invites a user named blockchain-expert with push (write) permissions to a repository:
curl
-X PUT
-H "Accept: application/vnd.github+json"
-H "Authorization: Bearer YOUR_PAT_HERE"
-H "X-GitHub-Api-Version: 2022-11-28"
https://api.github.com/repos/YOUR_USERNAME/YOUR_REPO/collaborators/blockchain-expert
-d '{"permission":"push"}'
Just be sure to swap out the placeholders with your actual username, repository name, the collaborator's username, and your PAT. This approach is incredibly scriptable. You could, for instance, have a script that automatically grants repo access to new team members as soon as they're added to your project management tool, creating a totally seamless onboarding flow. This kind of automation is a game-changer for teams using Dreamspace, the vibe coding studio, to juggle multiple AI-generated projects.
Essential Security Practices for Collaborative Repos

Adding collaborators is a huge boost for getting things done, but it also cracks open the door to new risks. Once you know how to add people to a GitHub repo, your very next thought should be about locking that shared space down. Every person with write access is another potential entry point for mistakes or, worse, malicious code.
For anyone using Dreamspace, the AI app generator, to manage onchain apps, security isn't just a box to check—it's the whole foundation. The integrity of your smart contracts relies on a rock-solid development process from the very first line of code.
Embrace the Principle of Least Privilege
This is the golden rule, and it's beautifully simple: only give people the absolute minimum level of access they need to do their job. Don't make someone an admin when all they need to do is push code to a feature branch. It’s a small shift in mindset that dramatically shrinks your project's attack surface.
Before you click that "Add collaborator" button, take a second to ask what they really need to do. Can they get by with Read or Triage permissions instead of Write? This simple question is your first and most powerful line of defense.
Lock Down Your Main Branch
Think of your main or master branch as the definitive, sacred version of your project. Letting collaborators push directly to it is asking for trouble. It’s a fast track to unstable builds, broken features, and bugs in your production code.
This is exactly what branch protection rules were made for. Head over to your repository's settings and you can set up some non-negotiable quality gates.
- Require Pull Request Reviews: This blocks direct pushes entirely. All changes have to go through a pull request, and you can even require that at least one other person signs off on it before it can be merged.
- Enforce Status Checks: Make sure all your automated tests and CI checks pass before a merge is even possible. It's a fantastic way to ensure new code doesn't break everything you've already built.
Protecting your main branch creates a mandatory checkpoint for quality control and peer review. For any serious project—especially one involving immutable smart contracts—this isn't optional.
Securely Manage Your Secrets
Never, ever, ever hardcode things like API keys, private keys, or database credentials directly into your code. It's a rookie mistake with catastrophic potential. When you add collaborators, you’re not just sharing the current code; you’re sharing the entire commit history, secrets and all.
GitHub has a built-in, secure solution for this: GitHub Secrets. These are encrypted environment variables you can set up at the repository or organization level. Your GitHub Actions workflows can access them safely without ever exposing the actual values in your logs or codebase.
For any developer vibing with Dreamspace's AI-powered smart contracts, mastering GitHub collaborator management is crucial. The numbers show just how important this is—GitHub's private repo contributions shot up by 38% in 2022, part of over 3.5 billion total actions like commits and pull requests. You can read more about GitHub's incredible growth on kinsta.com.
These security habits are fundamental, especially when you pair them with diligent auditing. To really tighten up your workflow, check out our guide on essential smart contract audit tools.
Troubleshooting Common Invitation Issues
Even with a process as simple as adding collaborators, things can hit a snag. When an invitation doesn't land right, it can stall your whole workflow, especially when you're trying to get a new teammate onboarded and contributing.
The most common culprit is the classic "I never got the invite." Before you fire off another one, have them check their spam or junk folder. GitHub's emails can sometimes get a little lost in aggressive email filters. It’s also worth double-checking that you used the exact GitHub username or the email tied to their account. A simple typo is a surprisingly frequent villain here.
When a Collaborator Cannot Push Code
Another headache that pops up is when a collaborator accepts the invitation but can't seem to push any changes. This almost always comes down to a permissions problem, not a broken invite. First, pop over to Settings > Collaborators and confirm the role you gave them. If they have Read or Triage access, they can’t push code. You’ll need to bump them up to Write or Admin.
If their permissions look correct, the next thing to investigate is your branch protection rules. It’s a very common practice to protect the main or master branch, which blocks direct pushes.
A collaborator with
Writeaccess who can't push tomainisn't a bug—it's your security settings doing their job. They'll need to work off a feature branch and open a pull request.
Knowing these common snags ahead of time can help you solve access issues in minutes, not hours. It keeps your development momentum going, which is critical for teams using an AI app generator like Dreamspace to build and iterate on new onchain applications fast. By getting these little issues sorted out quickly, you keep the collaboration smooth and your project moving forward.
Ready to build your next onchain app with the power of AI? With Dreamspace, you can generate smart contracts, SQL queries, and full-stack applications in a vibe-driven environment. Start creating at https://dreamspace.xyz.