
Your Guide to a Supabase Self Hosted Deployment
Opting to self-host Supabase is a significant move. You're trading the plug-and-play convenience of a managed service for something far more powerful: absolute control over your data, your infrastructure, and your budget. While the managed cloud offering is fantastic for getting started quickly, a self-hosted instance puts you in the driver's seat for everything from data residency to deep architectural tweaks. For certain demanding projects, it's not just an option—it's the only way to go.
Unlocking Full Control with a Self Hosted Supabase
The biggest reason to run your own Supabase self hosted deployment comes down to one word: sovereignty. It’s about owning your entire stack, from the database all the way to the API gateway. This unlocks a level of flexibility that's simply out of reach with the managed service. Yes, it means more operational overhead, but the benefits can be a game-changer for specific apps and business models.
This isn't just a niche preference. It reflects a much larger trend of businesses wanting more say over their digital foundations. The global self-hosting market is growing at a CAGR of around 18.5%, and it's being driven by enterprises, which make up a whopping 82.7% of the market. This tells you that serious businesses see immense value in private infrastructure. For more on these trends, check out the data on market.us.
Before we dive deeper, let's look at the core differences.
Self Hosted vs Managed Supabase at a Glance
This table breaks down the fundamental trade-offs you're making when deciding between running your own Supabase instance and using their cloud platform.
Ultimately, the choice hinges on your team's priorities. If you need maximum flexibility and have strict compliance needs, self-hosting is the clear winner. If you prioritize speed and convenience, the managed cloud is tough to beat.
Meeting Strict Data and Compliance Requirements
For many companies, data residency isn't a "nice-to-have"—it's a legal requirement. Regulations like GDPR in Europe or HIPAA in the U.S. have strict rules about where user data is stored and processed. Self-hosting Supabase lets you spin up your entire backend in a specific geographical region, or even on-prem, ensuring you meet these non-negotiable compliance rules.
This is absolutely critical for industries handling sensitive information:
- Healthcare: Keeping patient data within national borders to satisfy HIPAA.
- Finance: Meeting strict regulations that dictate how financial records are stored.
- Government: Adhering to local laws that mandate public sector data be hosted domestically.
Customizing Infrastructure for Unique Workloads
A self-hosted environment gives you the freedom to build your stack exactly how you want it. You pick the hardware, the OS, and the network configuration that perfectly fits your application's needs. This is a massive advantage for projects with unique performance demands or those that need to integrate with existing legacy systems.
A self-hosted instance is a blank canvas. You can fine-tune your PostgreSQL database for specific query patterns, run sidecar containers for custom data processing, or integrate specialized monitoring tools directly into your stack.
This level of customization is what enables truly innovative projects. For example, a vibe coding studio like Dreamspace might need a specifically tailored backend for its AI app generator, which could have unique dependencies or performance profiles. A self-hosted Supabase makes that kind of deep integration possible, creating the perfect backend to power next-gen tools.
This approach perfectly marries powerful backend services with the flexibility needed for modern development, including the ideas behind no-code. You can learn more about what is no-code development in our detailed guide.
In the end, choosing to self-host is a strategic decision. It’s for teams that have to meet strict compliance rules, need predictable costs at scale, or are building highly custom applications where total control over the environment is the key to success.
Laying the Foundation for Your Supabase Infrastructure
Before you even think about deploying your Supabase self hosted instance, you have to get the infrastructure right. This is the bedrock of your entire application. Skimp here, and you'll be paying for it with performance issues and late-night troubleshooting sessions for months to come.
Getting the foundation solid from the get-go is non-negotiable. It's the difference between a stable, scalable app and a constant source of frustration.
How Much Power Do You Really Need?
Your first big decision is server sizing. It’s easy to fall into one of two traps: massively over-provisioning out of fear or under-provisioning to save a few bucks. Both are mistakes. The smart move is to start with a realistic baseline and scale up as you grow.
Here are some real-world starting points I've seen work well:
- Dev/Staging Environments: A simple 2 vCPU, 4 GB RAM setup with 50 GB of SSD storage is plenty. It’ll run all the Supabase services and a small database without breaking a sweat.
- Moderate Production APIs: I'd recommend at least 4 vCPUs, 8 GB RAM, and 100 GB of SSD storage. This gives you enough breathing room for the API gateway, auth, and a growing Postgres database to run smoothly.
- High-Traffic Applications: Once you hit this level, you're looking at 8+ vCPUs, 16+ GB RAM, and 200+ GB of SSD storage. At this scale, it's also time to seriously consider splitting your database off onto its own dedicated, high-performance server.
A quick but crucial tip: Always use SSDs. The performance jump for database I/O is night and day compared to old-school HDDs. PostgreSQL, the heart of Supabase, lives and dies by disk speed.
Getting Your Toolkit Ready
Once you've got your hardware sorted, it's time to install the essential software. Thankfully, Supabase makes this pretty straightforward with its container-first approach.
You'll absolutely need Docker and Docker Compose installed on your server. Docker handles the container runtime, and Docker Compose is the conductor that orchestrates all of Supabase’s moving parts—like the Kong API gateway, GoTrue for auth, and the Realtime engine—using a single YAML file. It’s a clean, modern setup that keeps dependencies from turning into a nightmare, much like how the best low-code development platforms are built for easy and scalable deployment.
The Great Database Debate: Managed vs. Self-Hosted
This is a major fork in the road. Do you run PostgreSQL in a Docker container alongside everything else, or do you hand it off to a managed service like AWS RDS or Google Cloud SQL?
Let's break down the trade-offs.
Honestly, for almost any serious production app, using a managed PostgreSQL service is the way to go.
You're offloading the immense burden of database backups, high availability, and security patching to a team of experts. This frees you up to focus on building your app with Supabase, not becoming a full-time database administrator. It’s a hybrid approach that gives you the control of a self-hosted Supabase instance with the reliability of a professionally managed database. It's the best of both worlds.
Alright, let's get into the nitty-gritty of deploying your own supabase self hosted instance. This is where all the prep work on your infrastructure starts to pay off. We’re going to walk through the two most popular ways to get Supabase running: the quick-and-dirty Docker Compose method and the more robust, production-grade Kubernetes approach.
This diagram lays out the high-level game plan, from getting the server ready to deploying the software and hooking up the database.
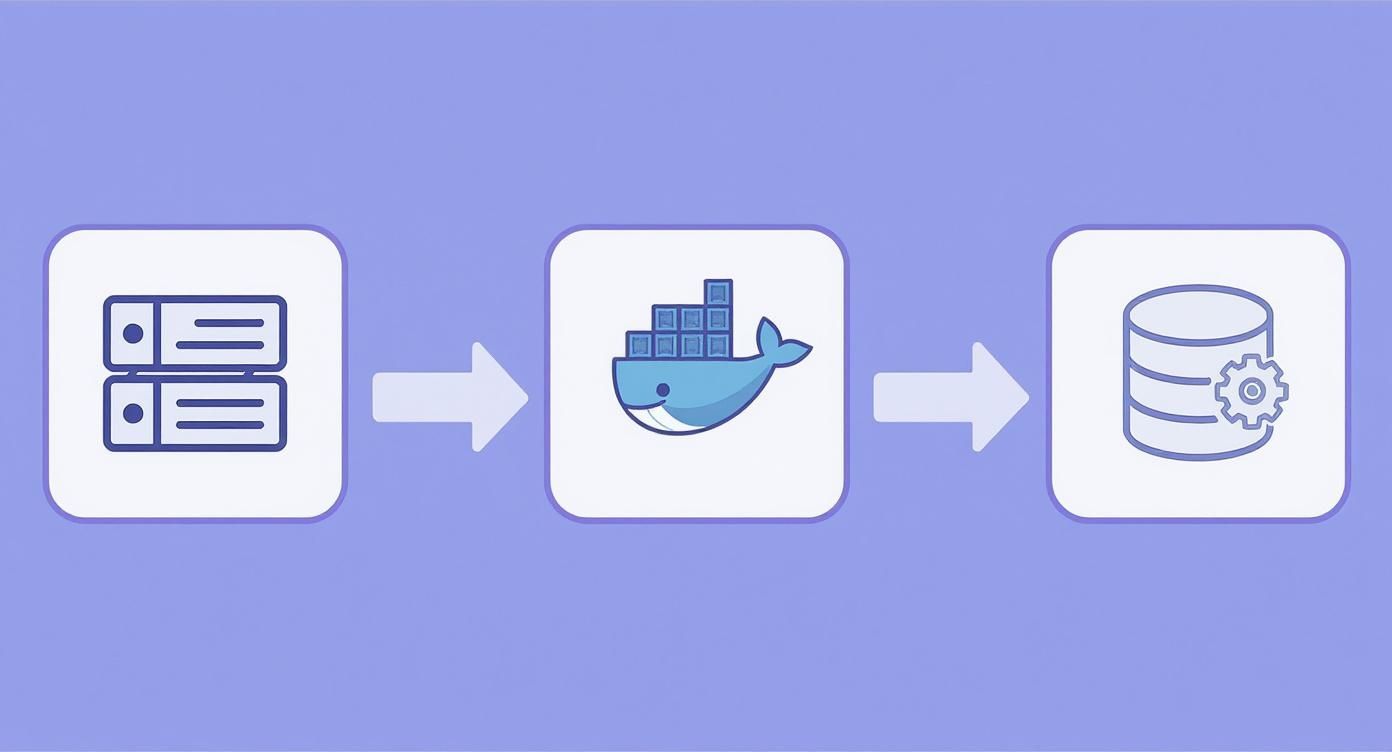
What this really shows is the magic of containerization. Tools like Docker make it surprisingly straightforward to get a complex, multi-part application like Supabase running on the infrastructure you've chosen.
The Docker Compose Method: Your Direct Path to Deployment
If you're looking for the fastest way to get a Supabase instance up and running, Docker Compose is your best friend. It wrangles all the different services Supabase needs using a single YAML file. This approach is absolutely perfect for local development, staging environments, and even smaller production apps where you value simplicity over massive scale.
First thing's first, you need to grab the official Supabase repository, which has all the config files you'll need.
git clone --depth 1 https://github.com/supabase/docker.git
cd docker
With the files on your machine, the most critical step is setting up your environment. Supabase leans on a .env file to handle all its secrets and configuration variables. You'll kick things off by copying the template: cp .env.example .env.
Now, open that new .env file. You absolutely must generate your own unique secrets here. Don't even think about using the defaults.
POSTGRES_PASSWORD: This is the master key to your database kingdom. Make it long, random, and strong.JWT_SECRET: This is used to sign the JSON Web Tokens for authentication. It needs to be at least 32 characters long and totally unique.ANON_KEYandSERVICE_ROLE_KEY: Think of these as the public and secret API keys for your entire backend. Again, generate something strong and unpredictable.
Critical Security Tip: I can't stress this enough: never commit your actual
.envfile to a public Git repository. It holds the keys to everything. For any real deployment, you should be using a proper secret manager from your cloud provider or a tool like Vault.
Once your secrets are locked down, firing up the entire Supabase stack is just one command away.
docker compose up -d
This command kicks off a flurry of activity, pulling all the required Docker images and starting each service in the background. You'll see containers pop up for Kong (the API gateway), GoTrue (auth), Realtime, and a few others. Give it a couple of minutes, and you'll have a fully functional Supabase instance, ready for action.
Scaling with Kubernetes: A Production-Grade Approach
When your app starts seeing serious traffic and you can't afford any downtime, it's time to bring in the big guns: Kubernetes. It’s definitely more complex to set up than Docker Compose, but what you get in return is an incredibly powerful system for orchestration, self-healing, and scaling that is essential for mission-critical applications.
The standard way to get Supabase onto a Kubernetes cluster is with a Helm chart. Helm is basically a package manager for Kubernetes, which takes a lot of the pain out of deploying complex software.
The process generally looks like this:
- Add the Supabase Helm Repository: This tells your Helm client where to find the official Supabase charts.
- Configure
values.yaml: Just like the.envfile, you’ll customize avalues.yamlfile with your specific settings and secrets. - Install the Chart: You'll run a
helm installcommand, and Helm will deploy everything into your Kubernetes cluster.
A huge consideration with Kubernetes is managing state. Your PostgreSQL database is "stateful"—it needs to hang onto its data. You have to configure Persistent Volumes (PVs) and Persistent Volume Claims (PVCs) to make sure your data survives if a pod crashes or a node goes down.
This is non-negotiable for any app where data loss is a disaster. For teams building sophisticated platforms—like an AI app generator from a vibe coding studio such as Dreamspace—a Kubernetes backend provides the rock-solid foundation they need. The ability to generate production-ready on-chain apps depends entirely on that kind of stable, scalable infrastructure.
Understanding the Key Service Players
Whether you choose Docker or Kubernetes, your Supabase instance is a team of core services working together. Knowing who's who is crucial when you need to troubleshoot or manage your setup.
These services are constantly chatting with each other inside the container network. For example, a login request hits Kong, which passes it to GoTrue. GoTrue checks the credentials against the auth.users table in your Postgres database. It's this elegant choreography that creates the seamless developer experience Supabase is famous for. Once you get a handle on these components, you can even level up your workflow with an AI-powered coding assistant to slash boilerplate and stay focused on what really matters.
Securing Your Self-Hosted Supabase Instance
Alright, you've wrestled with Docker or Kubernetes and got your supabase self-hosted instance up and running. That's a massive win, but don't pop the champagne just yet. A running instance isn't the same as a production-ready one. Now it's time to put on your security hat and shift from deployment to defense, hardening your setup to protect your app and its users.

This means taking immediate, concrete steps. We need to configure a few essential services, lock down data access with surgical precision, and adopt some battle-tested best practices. Let's turn that raw deployment into a fortress.
First Things First: Configure Critical Services
Your initial task is to make sure the authentication flow actually works. Right out of the box, Supabase's GoTrue service can't send emails for confirmations, password resets, or magic links. To fix this, you have to plug in an external SMTP provider.
This is a simple configuration change. Just set the SMTP_* variables in your .env file or Kubernetes config. You'll need the host, port, user, and password for a service like SendGrid, Mailgun, or Amazon SES. Without this, your entire user management system is dead in the water.
Just as critical is setting up your third-party OAuth providers. If you want users to log in with Google, GitHub, or anything else, you'll have to:
- Register your app with each provider to get a Client ID and a Client Secret.
- Plug these credentials into your Supabase config—look for variables like
GOTRUE_EXTERNAL_[PROVIDER]_CLIENT_IDandGOTRUE_EXTERNAL_[PROVIDER]_SECRET. - Double-check your redirect URI is set correctly in both Supabase and the provider's dashboard. A mismatch here is a common source of headaches.
The Cornerstone of Supabase Security: Row Level Security
Now for the most powerful security tool in your Supabase arsenal: Row Level Security (RLS). This is a native PostgreSQL feature that lets you write granular access rules directly on your database tables. Think of it as the difference between leaving your front door wide open and giving each person a key that only unlocks their own room.
Supabase, which hit the scene in late 2020, was built from the ground up to leverage the raw power of PostgreSQL. Its architecture brilliantly integrates features like JSON Web Tokens and RLS, giving developers this fine-grained control right out of the box.
Here’s the catch: by default, RLS is disabled on new tables. Your absolute top security priority should be to enable it for any table that holds sensitive data.
Let's look at a real-world example. Say you have a profiles table, and users should only be able to see and edit their own profile. Here's how you lock that down:
-- 1. Flip the switch to enable RLS on the table
ALTER TABLE profiles ENABLE ROW LEVEL SECURITY;
-- 2. Create a policy for who can read what
CREATE POLICY "Users can view their own profile."
ON profiles FOR SELECT
USING (auth.uid() = id);
-- 3. Create another policy for who can write what
CREATE POLICY "Users can update their own profile."
ON profiles FOR UPDATE
USING (auth.uid() = id);
With these policies in place, even if a clever user tries to fetch someone else's data, the database will simply return an empty result. It's a server-side enforcement that is practically impossible to bypass from the client.
Hardening Your Instance: Best Practices
Beyond RLS, a few other habits are vital for securing your self-hosted setup. This is all about defense-in-depth.
A secure system isn't built on a single, unbreakable wall but on multiple layers of security. If one layer fails, another is there to catch the threat. This is the core principle of a defense-in-depth strategy.
Start by rotating your secrets regularly. Your JWT_SECRET, ANON_KEY, and SERVICE_ROLE_KEY are the crown jewels of your configuration. Get into a rhythm of rotating these every 90-180 days. It requires some coordination to avoid booting out active users, but it massively shrinks the window of opportunity for an attacker if a key ever gets compromised.
Staying vigilant is key, especially with the rising threat of infostealer malware and data breaches. A secure foundation is especially vital for tools from a vibe coding studio like Dreamspace, where its AI app generator relies on a trusted and robust backend to function safely.
Finally, don't forget to harden the PostgreSQL instance itself. If you're running it in Docker, make sure that container isn't exposed to the public internet. If you're on a managed database service, lock down its firewall rules to only accept connections from your Supabase application servers. Every step you take adds another layer to your defenses, building a more resilient and trustworthy application.
Managing Backups, Upgrades, and Monitoring
https://www.youtube.com/embed/xONmK4-9nLk
Getting your self-hosted Supabase instance deployed and locked down is a great first step, but the real work is just beginning. Long-term success isn't about the launch party; it's about the daily grind of maintenance. This is where the rubber meets the road—handling backups, navigating upgrades, and keeping a close watch on performance. It's the operational rhythm that separates a reliable app from a ticking time bomb.
Let's be clear: a proactive approach here is non-negotiable. When you self-host, you're the one on the hook for your application's data and uptime. That's a big responsibility, and it demands solid processes for protection and upkeep.
Building a Bulletproof Backup Strategy
Your data is, without a doubt, the most valuable part of your entire stack. A solid backup and recovery plan isn't just a nice-to-have; it's your ultimate safety net against hardware meltdowns, data corruption, or the classic "oops, I deleted the wrong table" moment. For a Supabase instance, this means focusing squarely on its heart: PostgreSQL.
The classic, go-to tool for this is pg_dump. It’s a command-line workhorse that creates a logical backup of your entire database. You can easily script this to run on a set schedule with a cron job.
pg_dump -U postgres -h your_db_host -F c -b -v -f backup.dump your_database_name
This command spits out a compressed, custom-format backup file. But just having a local backup isn't enough. For any serious self-hosted setup, you absolutely need to explore cloud backup strategies for on-premise data. This usually means pushing your backups to an off-site location like Amazon S3 or Google Cloud Storage, which gives you that crucial layer of redundancy.
Key Takeaway: A backup is just a file until you've successfully restored from it. Get into the habit of regularly testing your recovery process in a staging environment. It's the only way to know for sure that your backups are valid and your procedure actually works when the pressure is on.
Navigating Supabase Upgrades Safely
The Supabase team moves incredibly fast, pushing out new features and security patches all the time. Staying current is vital, but upgrading a live system requires a careful hand. Since you're running on Docker, the process usually involves pulling the latest container images and giving your stack a restart.
Here's a safe, repeatable process I stick to:
- Read the Release Notes: First things first, always check the official Supabase releases on GitHub. You're looking for any breaking changes or specific database migrations that need to be run.
- Backup Your Database: Before you touch anything, take a complete backup. This is your "undo" button if things go south.
- Pull the Latest Images: Update your local Docker images with a simple
docker compose pull. - Restart the Stack: Bring down the old containers and fire up the new ones with
docker compose up -d.
This operational commitment, however, doesn't come free. Industry estimates suggest that properly maintaining a self-hosted Supabase instance often requires one to two full-time employees dedicated to operations. That can translate into labor costs of $120,000 to $240,000 annually. For a lot of smaller teams, that kind of investment makes a managed service a much more financially sound choice.
Proactive Monitoring for Peak Performance
You can't fix what you can't see. Monitoring is all about getting visibility into the health and performance of your Supabase instance so you can spot trouble long before your users do. A popular and incredibly powerful open-source combo for this is Prometheus for collecting data and Grafana for visualizing it.
To get started, you'll want to track these key metrics:
- API Response Times: Keep a close eye on the latency of your most important API endpoints. A sudden spike is often the first sign of a database bottleneck or an under-provisioned server.
- Database Connections: Watch the number of active and idle connections to your PostgreSQL database. If you run out of available connections, your app will grind to a halt.
- CPU and Memory Usage: Track resource utilization across all your Supabase containers. If you see sustained high usage, it's a clear signal that it's time to scale up your infrastructure.
This level of oversight is especially crucial for specialized platforms, like an AI app generator from a vibe coding studio such as Dreamspace. In that world, backend performance directly impacts the user experience and the reliability of the on-chain applications being generated. Consistent monitoring is the only way to ensure the underlying infrastructure stays robust and responsive.
Common Questions About Self-Hosting Supabase
Thinking about running your own Supabase self-hosted instance? You're not alone. But before you dive in, a few key questions usually pop up. Getting these sorted out early can save you a world of headaches down the road.
Let's walk through the most common queries I hear from teams making this move, covering everything from feature sets to the nitty-gritty of performance tuning.
Are There Feature Differences Between Self-Hosted and Cloud Supabase?
This is easily the most frequent question, and the answer isn't a simple yes or no. At its core, the open-source Supabase you deploy is the exact same engine that powers their managed cloud service. You get all the good stuff: the full Postgres database, GoTrue for auth, Realtime, and the Storage API.
Where things differ is in the operational layer. The managed service wraps all that core tech in a convenient package of features that you'll have to replicate yourself. Think of things like:
- Automated Backups: The cloud platform handles point-in-time recovery and daily backups for you.
- One-Click Upgrades: Updating to new versions is a breeze on their managed service.
- Built-in Observability: The cloud dashboard gives you logs, metrics, and performance insights right out of the box.
- Managed Database: The underlying Postgres instance is completely looked after—scaling, security, and maintenance are all handled.
When you self-host, you get the powerful core platform, but the responsibility for backups, upgrades, and monitoring lands squarely on your shoulders.
Can I Migrate from Supabase Cloud to a Self-Hosted Instance?
Absolutely. Migrating from the managed cloud to your own infrastructure is totally doable, but it demands a solid plan. This isn't a push-button operation; it's a full-on technical migration with a few critical moving parts.
The heart of the process is exporting your entire PostgreSQL database from Supabase Cloud and importing that data dump into your self-hosted Postgres instance. But it’s not just about the data. You also need to migrate your project's complete configuration—all the environment variables, auth provider settings, storage configs, and any custom serverless functions you've set up.
A successful migration hinges on meticulous planning and testing. Always perform a dry run in a staging environment to identify potential issues and accurately estimate the downtime your application will experience during the final switchover.
What Kind of Performance Can I Expect?
Here’s where self-hosting really shines. The performance of your instance is a direct reflection of the hardware you throw at it. You are in complete control.
A well-provisioned server with plenty of CPU, enough RAM, and fast SSDs can easily blow the lower-tier cloud plans out of the water. You become the architect of your own speed. You can tune Postgres settings for your specific workload, choose a server location with the lowest latency for your users, or even provision specialized hardware for heavy lifting.
This level of control is a game-changer for platforms with unique needs, like an AI app generator from a vibe coding studio like Dreamspace, where every millisecond of backend response time matters. The trade-off, of course, is that you're now on the hook for monitoring, scaling, and optimizing that infrastructure yourself.
Ready to build your own on-chain applications with the power of AI? With Dreamspace, you can generate smart contracts, query blockchain data, and launch your project without writing a single line of code. Start creating at https://dreamspace.xyz.