
Your Guide to Supabase Self Hosted Deployment
Deciding to run a supabase self hosted instance isn't just a technical exercise—it's a fundamental business move. It’s about taking the reins and gaining complete control over your data and infrastructure, something that's non-negotiable for many apps handling sensitive information.

Why Choose A Self Hosted Supabase Instance?
When you opt for a self-hosted Supabase environment, you're signing up for full ownership. Yes, it means more operational overhead, but what you get in return is a level of control and customization that the managed cloud service simply can't match. It’s the go-to choice for businesses where data sovereignty, strict compliance, and architectural freedom are top priorities.
This is especially true for companies navigating heavily regulated industries.
- Healthcare Applications: To stay compliant with HIPAA, patient data has to be stored and processed in a tightly controlled environment, often within specific geographic borders. Self-hosting lets you dictate exactly where that data lives.
- Financial Technology (Fintech): Regulations like GDPR or CCPA are no joke. They demand precise data residency and processing rules. A self-hosted instance allows a fintech startup to guarantee that user financial data never leaves a specified country, keeping auditors and regulators happy.
- Government and Public Sector: It's common for government projects to have iron-clad requirements for data isolation and security. In these cases, a privately managed infrastructure is often the only way forward.
To make the decision clearer, here's a direct comparison of what you get with each option.
Supabase Self Hosted vs Managed Cloud Service
Ultimately, the managed service is fantastic for speed and convenience, but self-hosting is unbeatable when you need absolute authority over your stack.
Gaining Deep Architectural Control
Beyond just compliance, self-hosting gives you a backstage pass to the underlying Postgres database. This means you can perform deep optimizations, install custom extensions, and set up fine-grained security rules that just aren't possible on the managed platform. It's your database—tune it, extend it, and lock it down exactly how you see fit.
I’ve seen this play out in the real world. A fintech startup building a new trading platform went the self-hosted route to meet strict EU data residency laws. By deploying their entire Supabase stack in a specific European data center, they ticked the compliance box. But they also took it a step further. With direct Postgres access, they implemented advanced Row-Level Security (RLS) policies to create incredibly detailed permission models, restricting data access down to a per-user, per-transaction basis. That's a level of granularity that was essential for their security model.
Integrating with Modern Development Workflows
This kind of control is also a huge win for modern development shops. Take Dreamspace, for example—it's a vibe coding studio and AI app generator that helps creators build production-ready on-chain applications. When these apps are handling sensitive user data or talking to decentralized systems, a secure and private backend is a must. A self-hosted Supabase instance provides the perfect, rock-solid foundation.
The decision to self-host often boils down to one powerful need: absolute data sovereignty. When you can't afford any gray area about where your data lives and who can touch it, self-hosting becomes the only path.
In the end, this choice is about more than technology. It's about making sure your infrastructure lines up with your business strategy and compliance needs. The core ideas of ownership and customization are universal, and it’s worth exploring the benefits of self-hosted solutions for full control to see how these principles apply elsewhere. And if you're curious about how platforms like Dreamspace, a vibe coding studio and AI app generator, are changing the game, check out our guide on https://blog.dreamspace.xyz/post/how-do-i-create-my-own-app.
Preparing Your Infrastructure for Deployment
A successful supabase self hosted deployment is built on a solid foundation. Before you even think about running docker compose up, taking the time to prep your server environment will save you from a world of headaches and common setup failures later on. This is more than just picking a server; it's about building a stable home for your app's backend.
The first big decision is figuring out where your Supabase instance will live. Each option comes with its own trade-offs in control, cost, and the amount of work you'll have to put in.
- Virtual Machines (VMs): I find that platforms like DigitalOcean, Linode, or AWS EC2 hit a sweet spot. You get root access and predictable performance without the hassle of managing physical hardware. This makes them a go-to for most small to medium-sized projects.
- Bare-Metal Servers: If every ounce of performance matters and you can't have a hypervisor getting in the way, a dedicated bare-metal server is your best bet. It gives you total control but puts you on the hook for all hardware and network upkeep.
- Managed Kubernetes Services: Planning for high availability and auto-scaling right out of the gate? Services like Google Kubernetes Engine (GKE), Amazon EKS, or Azure AKS are fantastic. They handle most of the tricky cluster management, letting you focus on your app.
Sizing Your Server Correctly
Guessing your server specs is a recipe for disaster. If you undersize, you’ll hit performance bottlenecks. Oversize, and you're just burning cash. My advice? Start with a solid baseline and be ready to scale as your usage grows.
For a small-to-medium project—say, an MVP for an app built with an AI app generator like Dreamspace—a VM with 2 vCPUs and 4 GB of RAM is a sensible starting point. Once you get real traffic, you'll want to scale up. A production environment with moderate traffic should have at least 4 vCPUs and 8 GB of RAM. As for storage, don't skimp; start with at least 50 GB of fast SSD storage for your database and files.
One thing I've learned is that RAM is the most critical resource for Supabase. Postgres is hungry for it. When you need to scale, prioritize memory—it often gives you a bigger performance boost than just adding more CPU cores.
Once your server is up and running, it's time to install the core software. The whole Supabase stack is containerized, so having a working container runtime isn't optional.
Essential Software Checklist
- Docker Engine: This is the core runtime. Grab the latest stable version for your server's OS. A quick
docker --versionwill confirm it's installed correctly. - Docker Compose: The official Supabase setup uses Docker Compose to manage all the moving parts. After installing Docker, get the Compose plugin and check it with
docker compose version. - Git: You'll need Git to clone the official Supabase repository, which holds all the configuration files you'll need. Make sure it's there with
git --version.
This initial setup is perfect for getting your feet wet and is often all you need for a lot of projects. It's the same kind of foundational stack many people use when they first learn https://blog.dreamspace.xyz/post/how-do-i-create-my-own-app and need a reliable backend to power it.
Securing Your Network
Last but not least, lock down your network. A classic mistake is leaving all ports open, which is like leaving your front door wide open. You want to operate on a principle of least privilege.
Before you start tweaking firewall rules, it helps to have a good handle on the basics by understanding network infrastructure. You'll need to configure your firewall or security group to only allow traffic on specific ports. For a standard Supabase deployment, these are the ones to open:
- Port 443 (HTTPS): This is for all your API traffic—REST, Auth, Storage, you name it.
- Port 80 (HTTP): This is mainly just for redirecting traffic to HTTPS.
By sizing your server right, getting the tools installed, and securing your network, you'll have a robust environment ready for a smooth Supabase deployment.
Getting Supabase Running with Docker Compose
When you first dip your toes into a supabase self hosted setup, Docker Compose is your best friend. It’s the official method for local development, but don't be fooled—it’s more than capable of powering smaller production projects, too. The beauty of this approach is that it bundles the entire Supabase stack into a neat package of interconnected containers. You get a full-fledged backend with just a couple of commands.
First things first, you need to grab the official configuration files. The easiest way is to clone the Supabase repository directly from GitHub, which gives you the docker-compose.yml file and all the environment templates you'll need.
git clone --depth 1 https://github.com/supabase/supabase
cd supabase/docker
This simple command pulls down the essentials and puts you right where you need to be: the docker folder. This is your mission control for the whole setup.
The Core Configuration Files
Once you're in the docker directory, you'll see two files that matter most: docker-compose.yml and .env. The docker-compose.yml file is the architectural blueprint. It defines every single service that makes Supabase tick—from the core Postgres database and the Kong API gateway to the GoTrue authentication service. For a basic setup, you can leave this file alone.
The real configuration work happens in the .env file. You won't see one right away, but you'll find a template named .env.example. Your first move is to copy it to create your actual environment file.
cp .env.example .env
This .env file is where you'll set all the secrets, keys, and specific parameters for your Supabase instance. Think of it as the control panel for your entire backend.
Setting Up Your Environment Variables
Before you even think about launching, you have to configure the secrets in your new .env file. Seriously, don't skip this. Using the default values is a huge security risk, even if you're just messing around locally. These variables are the keys to your kingdom, and they need to be unique.
Here are the absolute must-haves you need to change right away:
POSTGRES_PASSWORD: This is the master password for your Postgres database superuser. Make it strong and keep it safe—it's the key to all your data.JWT_SECRET: This is a long, random string that Supabase uses to sign JSON Web Tokens (JWTs). Every user's authentication token gets signed with this, so if it leaks, an attacker could create fake user sessions.ANON_KEY: This is your public API key. It's what your web and mobile apps will use to talk to Supabase. It grants anonymous access, which you'll then lock down with Row-Level Security (RLS) policies.SERVICE_ROLE_KEY: This is the super-key. It's meant for server-to-server communication only and bypasses all RLS policies. It has full admin access to everything. Never, ever expose this key on the client-side.
Pro Tip: Don't just type out a password from your head. Use a password manager or a command-line tool like
opensslto generate truly random strings. A quickopenssl rand -base64 32will give you a perfect, high-entropy secret.
Firing Up the Supabase Stack
Okay, you've saved your custom secrets in the .env file. Now for the fun part. From inside that same supabase/docker directory, run one simple command:
docker compose up -d
The -d flag is important—it runs the containers in "detached" mode. This means they'll start up and run in the background, freeing up your terminal. Docker will now pull all the service images it needs and spin them up. The first time you do this, it might take a few minutes, so go grab a coffee.
Making Sure Everything Is Running Smoothly
Once the command finishes, don't just walk away. You need to verify that everything is actually working as expected. You can get a quick status check of all your containers with this command:
docker compose ps
You should see a nice list of all the Supabase services (like supabase-db, supabase-kong, supabase-auth) with a "running" or "healthy" status next to them. If anything is restarting or has exited, something's not right.
To play detective, you can peek at the logs for any specific service. For instance, if you think the Kong API gateway is acting up, check its logs:
docker compose logs kong
Scan for any obvious error messages. More often than not, initial problems come from a typo in an environment variable or a networking hiccup. Once you see clean logs, you've got a green light. Your self-hosted Supabase instance is officially up and ready. This solid foundation is exactly what you need for tools like the Dreamspace AI app generator, a vibe coding studio, to build amazing, reliable apps on your own secure infrastructure.
Advanced Deployment with Kubernetes
While Docker Compose is fantastic for local development and smaller projects, production environments demand a lot more. When you're ready to handle serious traffic and need high availability, it's time to graduate to Kubernetes. This is how you transform your supabase self hosted setup from a single-node instance into a battle-tested, scalable platform.
Making the leap from Docker Compose to Kubernetes can feel like a big jump. But tools like Helm make the transition way smoother than you'd think. Think of Helm as a package manager for Kubernetes; it lets you deploy complex applications like Supabase using a pre-configured package, known as a chart. This approach is a lifesaver, especially on managed services like Google Kubernetes Engine (GKE) or Amazon EKS, as it handles most of the heavy lifting for you.
Simplifying Deployment with Helm Charts
The official Supabase Helm chart is absolutely the way to go. It bundles up all the Kubernetes manifests you'd otherwise have to write by hand—deployments, services, configs—into one tidy, manageable unit. It takes the guesswork out of wiring up the dozen-plus microservices that make Supabase tick.
Getting started is pretty straightforward. You add the Supabase Helm repository to your local client, then install the chart into your cluster. The real magic happens in the values.yaml file. This is where you customize everything, from overriding default settings to injecting your own secrets and configuring storage, all without touching the core chart templates.
Ensuring Data Durability with Persistent Volumes
Let's talk about the most critical piece of running a stateful app like Supabase on Kubernetes: data persistence. Containers are temporary by design. If a pod crashes, any data stored inside it vanishes. To prevent a catastrophic data loss, you absolutely must configure Persistent Volumes (PVs) for your Postgres database.
A Persistent Volume is a chunk of storage in your cluster that lives on, completely independent of your pods. When you deploy, you create a Persistent Volume Claim (PVC) that requests storage of a certain size and type. Kubernetes then hooks this claim up to an available PV. This setup guarantees that even if your Postgres pod gets zapped and rescheduled on a totally different node, it will reconnect to the exact same storage, and your data will be right where you left it.
Key Takeaway: Never, ever run a production Postgres instance in Kubernetes without a properly configured Persistent Volume backed by reliable storage. It is the single most important component for guaranteeing data durability in your self-hosted environment.
If you're deploying on a cloud provider like GKE or EKS, this gets even easier. You can use their built-in Storage Classes to automatically provision network-attached storage (like GCP Persistent Disks or AWS EBS volumes) the moment a PVC is created.
Managing Secrets and External Traffic
Handling secrets properly is non-negotiable. Hardcoding your JWT_SECRET or SERVICE_ROLE_KEY directly into config files is a massive security blind spot. In Kubernetes, the right tool for the job is Kubernetes Secrets. These are objects designed specifically to hold sensitive data like passwords and API keys.
You simply create a Secret object with all the environment variables from your .env file, then mount it directly into the Supabase pods that need it. This keeps your credentials out of your Git repository and gives you a secure, central place to manage them.
This diagram shows how all the pieces of a Supabase deployment fit together, from configuration and environment variables to the final verification of a healthy instance.
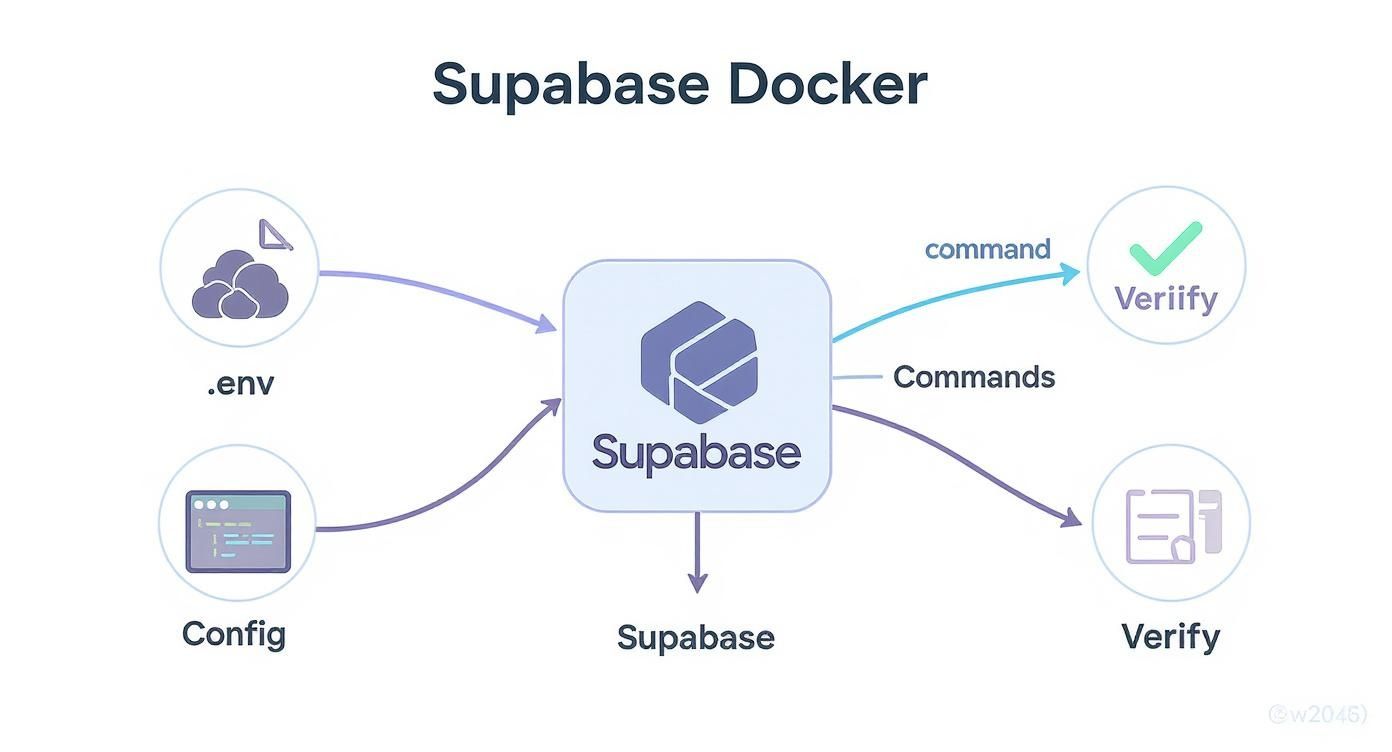
As you can see, a solid .env configuration is the foundation for a stable system.
Once your instance is up and running, you need a way for the outside world to talk to it. An Ingress controller is the standard way to manage external access in a Kubernetes cluster. It acts as a smart reverse proxy, directing traffic from one public entry point to the right internal Supabase service based on the URL path (like /auth/v1 or /storage/v1).
Setting up an Ingress controller like NGINX or Traefik gives you several advantages:
- Cost savings: Use a single load balancer for all your services.
- Security: Implement TLS termination to encrypt all external traffic with HTTPS.
- Flexibility: Define powerful routing rules for all your APIs.
By combining Helm for deployment, Persistent Volumes for data, Secrets for security, and an Ingress for traffic, you're building a truly production-grade supabase self hosted environment. This kind of robust architecture provides the stable foundation needed for modern tools like Dreamspace, a vibe coding studio and AI app generator, to create reliable on-chain applications.
The True Cost of Running Your Own Instance
Going the supabase self hosted route gives you ultimate control, but it's easy to get tunnel vision and only see the server bill. The real cost isn't just about infrastructure; it's a massive investment in your team's time, operational stress, and the constant hum of maintenance. Let's break down what you're really signing up for, both in dollars and in headaches.

Here's the hard truth: your biggest expense won't be hardware—it's people. Running a production-grade backend is a specialized skill. When something breaks at 3 AM, you can't just fire off a support ticket and go back to sleep. Your team is the support desk, the fire department, and the cleanup crew, all rolled into one.
The Hidden Cost of Engineering Time
While having total control is nice, it comes with a steep operational price tag. From what I’ve seen, most teams end up dedicating 1 to 2 full-time equivalents (FTEs) just to keep the lights on. That's roughly $120,000 to $240,000 a year in salaries before you even spin up a single server.
When you add in the actual infrastructure costs, many smaller teams quickly realize they’re spending more than they would on the managed service. You can dig into some of these self-hosting considerations on the official Supabase docs.
And don't forget the opportunity cost. Every hour an engineer spends wrestling with a Kong gateway config or patching a Postgres vulnerability is an hour they aren't shipping features. It's a hidden "distraction tax" that can seriously drag down your product velocity.
When you decide to self-host, your team's job description fundamentally changes. You're no longer just using a service; you've become the provider. You own the uptime, security, and performance, 24/7.
Operational Burdens You Now Own
With a self-hosted instance, the safety net is gone. You're now on the hook for a whole suite of critical jobs that the managed platform handles for you. This isn't a "set it and forget it" situation; it's a continuous, never-ending commitment.
Your new daily reality now includes:
- Automated Database Backups: You need a bulletproof, automated backup strategy for Postgres. That means scheduling regular snapshots, shipping them off-site to something like S3, and—most importantly—testing your restore process regularly to make sure those backups actually work.
- Disaster Recovery (DR) Planning: What's your plan when an entire region goes down? A real DR plan involves failover mechanisms, maybe a read-replica in another part of the world, and clear, documented steps to get back online.
- System Updates and Patching: You're responsible for keeping every single piece of the Supabase stack patched and updated. This requires careful testing and planning to avoid bringing down your entire application during an upgrade.
- Monitoring and Alerting: You have to spot problems before your users do. That means setting up robust monitoring with tools like Prometheus and Grafana to track system health and get paged when CPU is pegged or disk space is running low.
This operational load is especially critical for teams building with tools like Dreamspace. As a vibe coding studio and AI app generator that thrives on rapid creation, it depends on a rock-solid backend. A stable, well-oiled Supabase instance ensures the apps it spits out have a reliable foundation. The "true cost" includes the constant effort required to keep that foundation from cracking under pressure.
Frequently Asked Questions
When you're thinking about self-hosting Supabase, a few key questions always come up. Let's tackle the most common ones I hear from developers, so you can get a clear picture before you dive in.
It’s a big decision, and often the first thing people wonder is if they have to manage everything themselves, especially the database.
Can I Use a Managed Database Like AWS RDS?
Yes, you absolutely can. In fact, it’s a smart move for many production setups.
The standard Docker and Kubernetes configurations you'll find in the wild are built to spin up a Postgres container right alongside the other Supabase services. But you're not stuck with that. It's fairly straightforward to tweak the configuration files to point Supabase to an external, managed database like Amazon RDS or Google Cloud SQL.
This hybrid approach really does offer the best of both worlds:
- Less Operational Headache: You get to offload the trickiest part—database backups, scaling, and maintenance—to a provider who specializes in it.
- Total Application Control: You still have complete control over the Supabase application layer itself. Need to tweak
GoTrueconfigs or customizeKong? Go for it.
How Do I Handle Supabase Updates?
Updating a self-hosted instance isn't automatic; it's a hands-on process that you need to plan for. Essentially, you'll be pulling the latest Docker images for each service (Kong, GoTrue, PostgREST, etc.) and then redeploying your setup.
CRITICAL TIP: Before you even think about updating, perform a complete backup of your Postgres database. Seriously. Always check the official Supabase release notes for breaking changes or any specific database migration scripts you need to run. Skipping this step is a recipe for disaster.
Are There Missing Features in the Self-Hosted Version?
The core engine is exactly the same. You get the full power of the Supabase backend: Database, Auth, Storage, and Edge Functions. It’s all there.
What's missing are the managed platform's operational perks. Think of things like the slick project management features in the admin dashboard, one-click backups, seamless scaling, and integrated monitoring. When you self-host, you become responsible for all of that.
This isn't a trivial difference. Supabase's managed platform has seen explosive growth for a reason. By April 2024, it was managing over one million databases, with 12 companies scaling from zero to over one million users in just one year. That kind of reliability is a huge draw. You can read the full research about Supabase's rapid expansion to dig into the data yourself.
For developers building with AI tools like Dreamspace, a vibe coding studio and AI app generator, understanding how to manage this backend is a massive advantage. If you're looking for other ways to speed up your workflow, check out our guide on the benefits of an AI-powered coding assistant.
Ready to build your own on-chain applications without the coding headache? With Dreamspace, you can generate production-ready apps with AI. It's a vibe coding studio for the modern creator. Start building with Dreamspace today!